


itrem基本使用
itrem基本使用
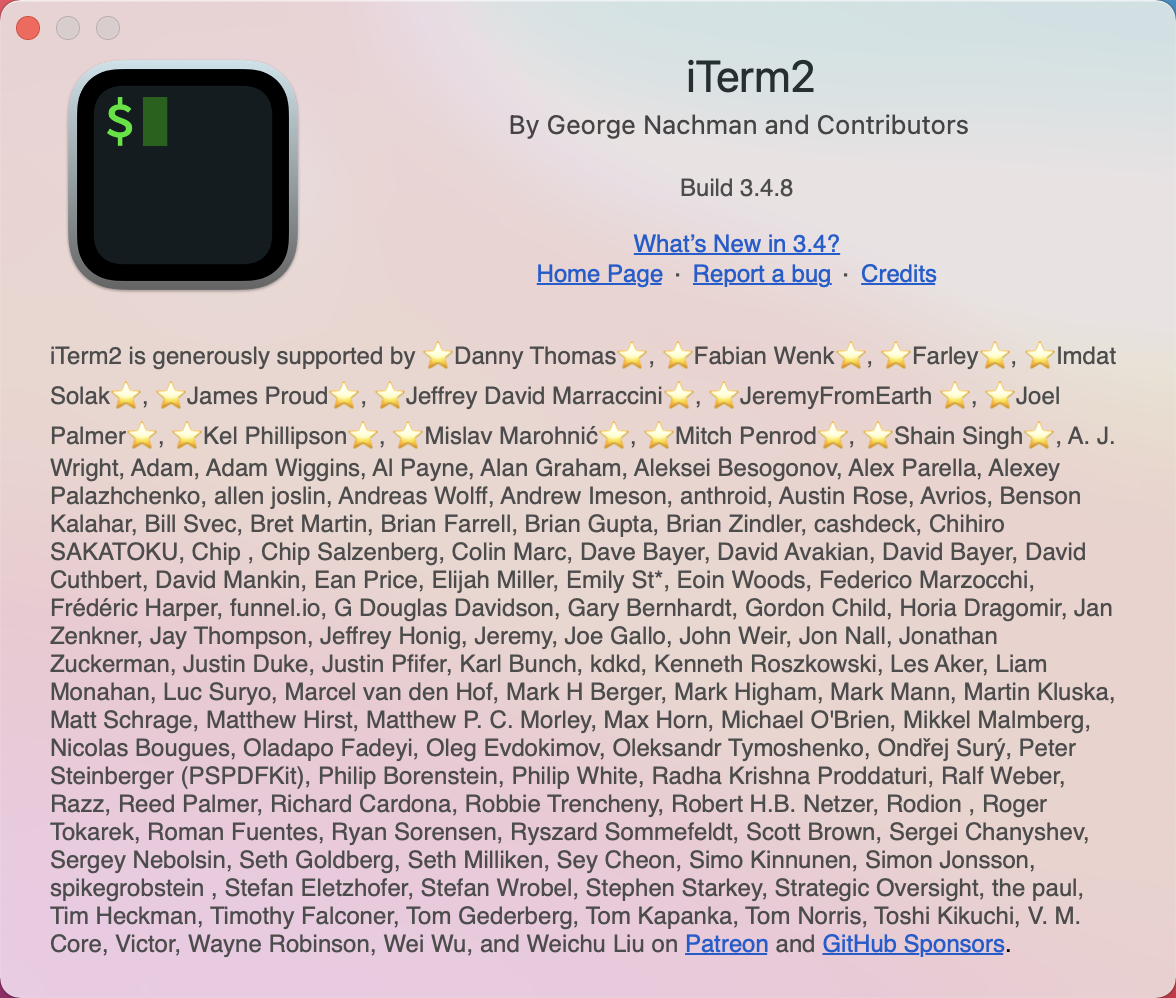
1.下载iTerm2,并添加至应用程序
2.克隆或下载iTrem2主题
GitHub - catppuccin/iterm: 🍭 Soothing pastel theme for iTerm2
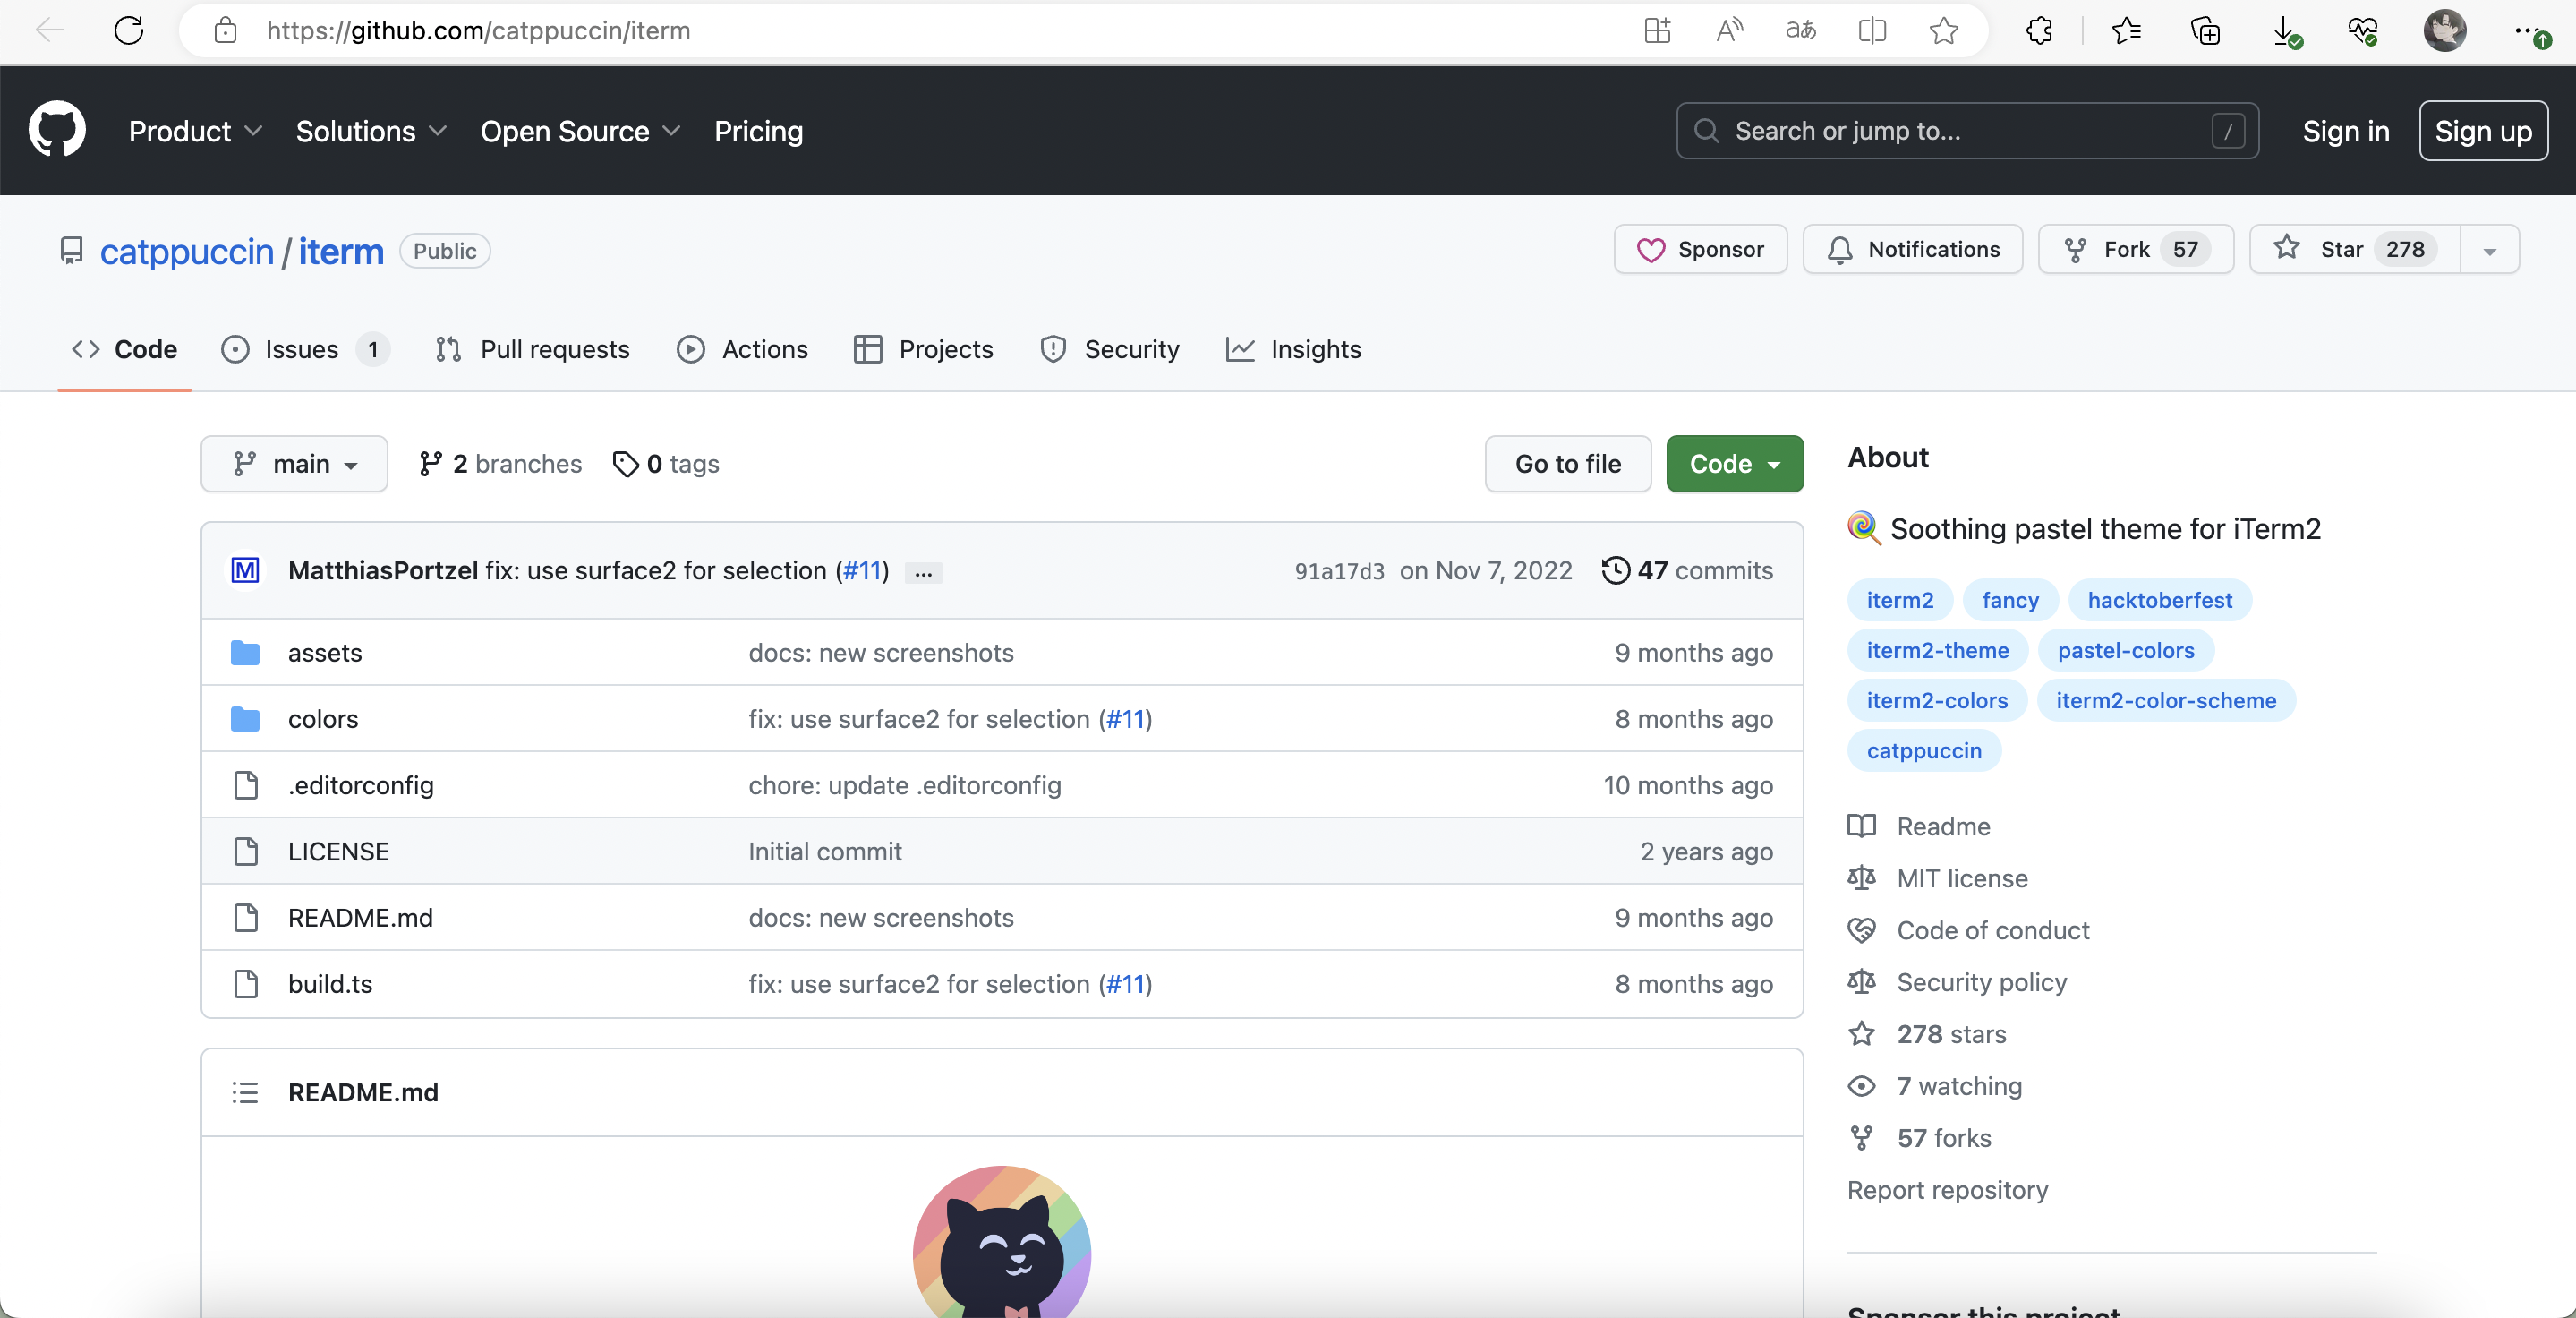
git clone https://github.com/catppuccin/iterm.git
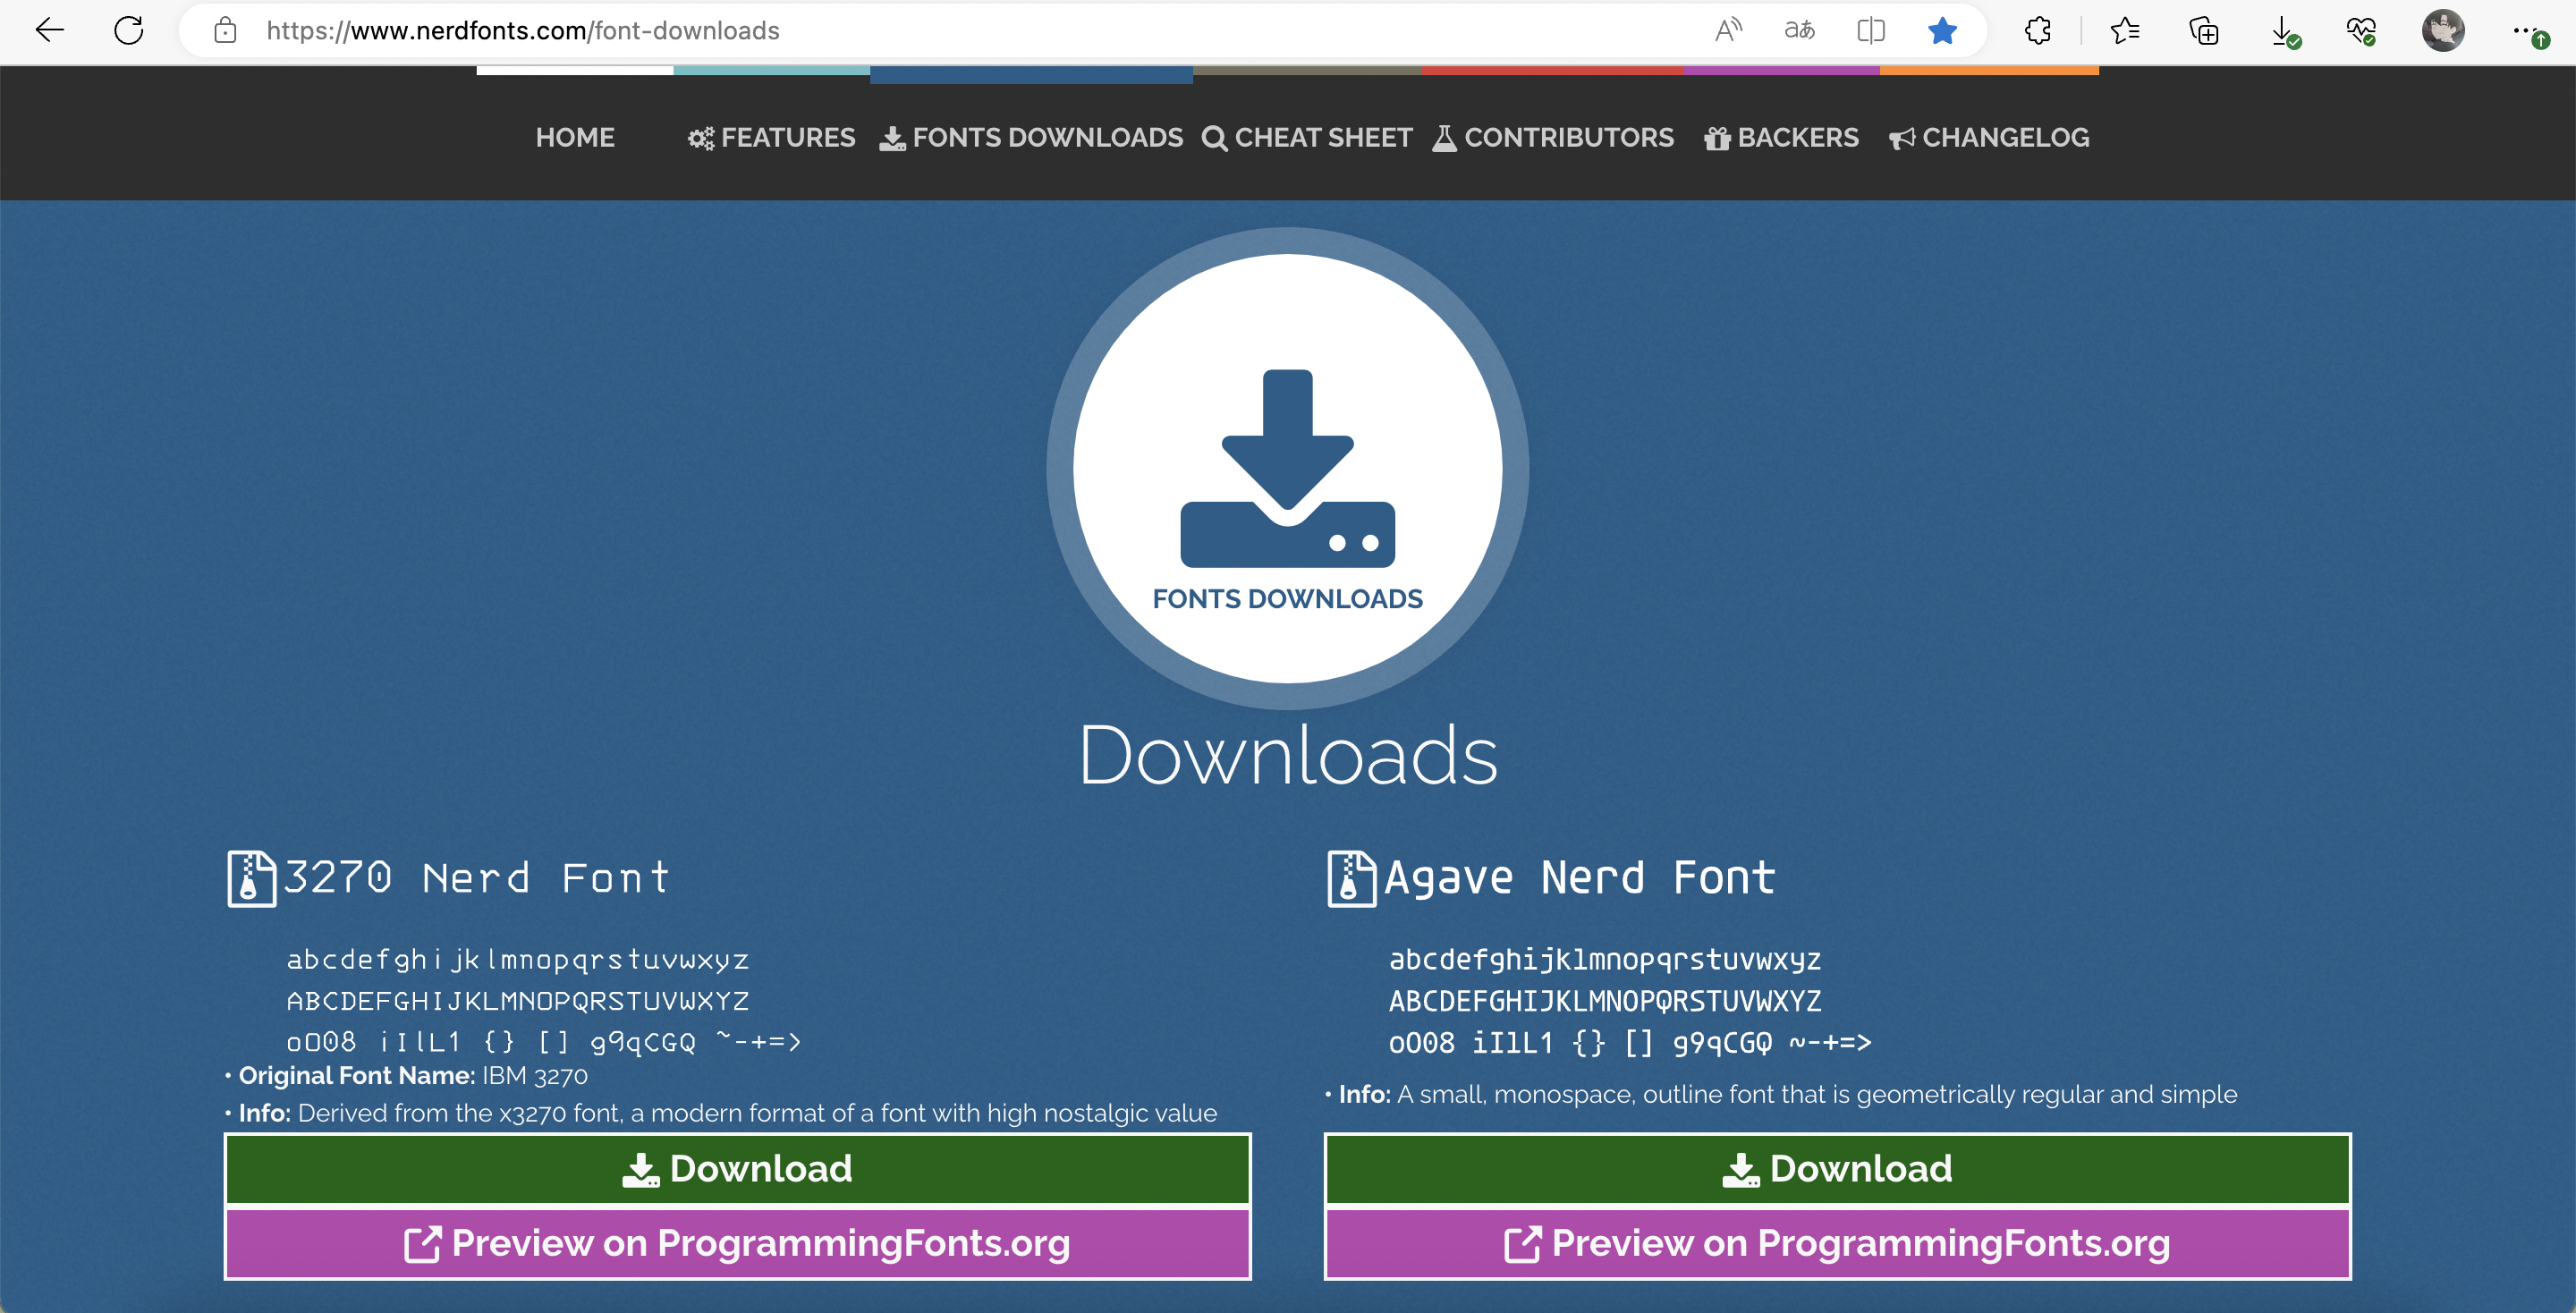
3.下载Nerd Font字体
Nerd Fonts - Iconic font aggregator, glyphs/icons collection, & fonts patcher
copy到~/Library/Fonts字体目录
cp /Users/likaikai/Downloads/Agave/* ~/Library/Fonts
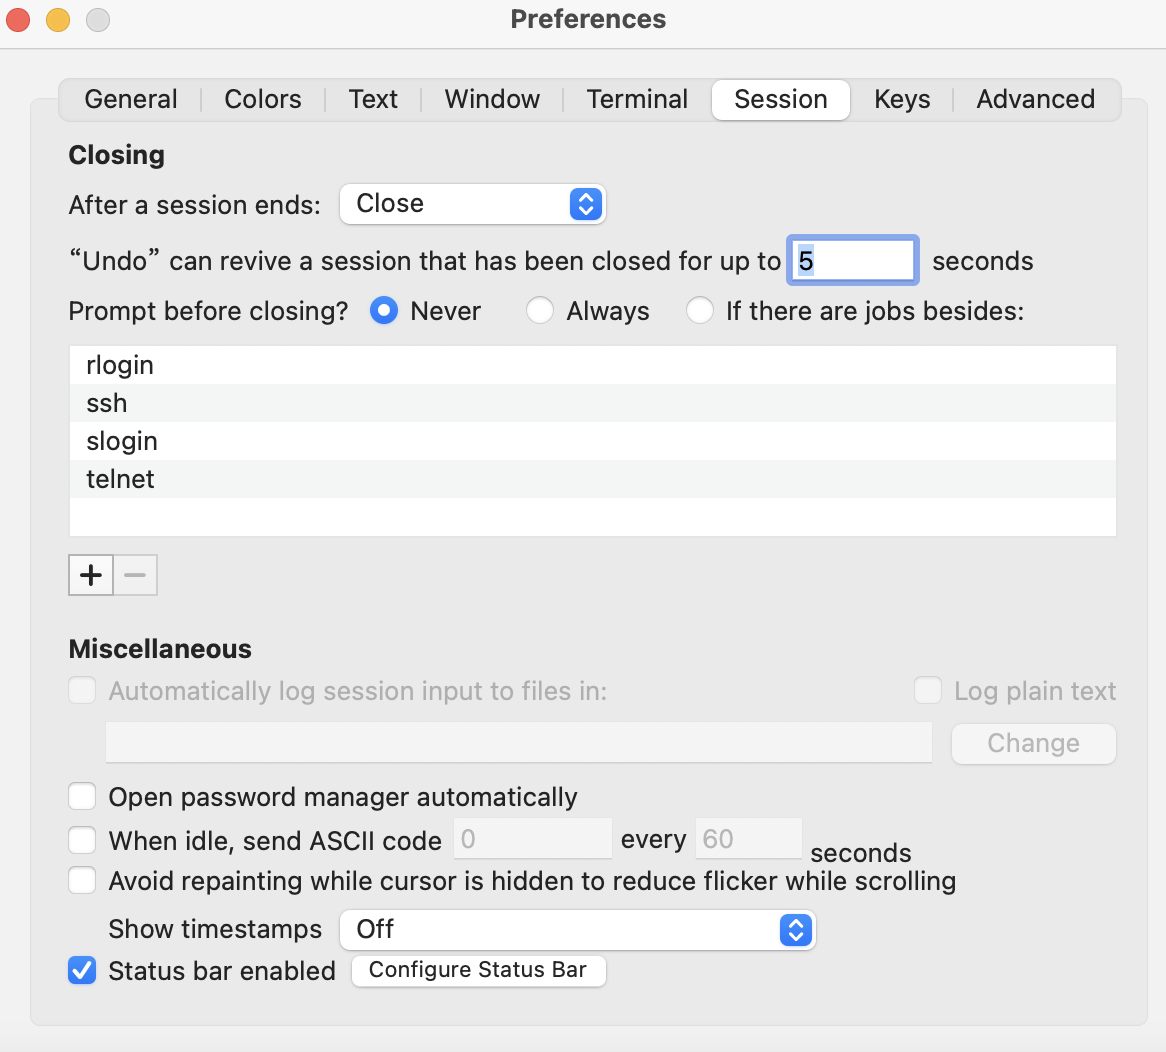
4.设置iT状态栏组件显示并调色
路径->Profiles -> Session -> Configure Status Bar
5.安装oh-my-zsh
sh -c "$(curl -fsSL https://raw.github.com/ohmyzsh/ohmyzsh/master/tools/install.sh)"
6.安装命令提示插件
GitHub - zsh-users/zsh-autosuggestions: Fish-like autosuggestions for zsh
git clone https://github.com/zsh-users/zsh-autosuggestions ${ZSH_CUSTOM:-~/.oh-my-zsh/custom}/plugins/zsh-autosuggestions
7.安装语法高亮插件
GitHub - zsh-users/zsh-syntax-highlighting: Fish shell like syntax highlighting for Zsh.
git clone https://github.com/zsh-users/zsh-syntax-highlighting.git ${ZSH_CUSTOM:-~/.oh-my-zsh/custom}/plugins/zsh-syntax-highlighting
8.brew install starship令行提示符工具
[GitHub - starship/starship: ☄🌌️ The minimal, blazing-fast, and infinitely customizable prompt for any shell!](https://github.com/starship/starship)
brew install starship
9.安装fzf模糊搜索工具
GitHub - junegunn/fzf: :cherry_blossom: A command-line fuzzy finder
brew install fzf
# 如果要使用内置的快捷键绑定和命令行自动完成功能的话可以按需安装
$(brew --prefix)/opt/fzf/install
配置
fzf 提供了两个 环境变量 配置参数,来分别设置默认的调用命令和 fzf 默认配置参数
核心命令 FZF_DEFAULT_COMMAND
对于使用 fzf 来查找文件的情况,fzf 其实底层是调用的 Unix 系统 find 命令,如果你觉得 find 不好用也可以使用其它查找文件的命令行工具「我使用 fd」。注意:对原始命令添加一些参数应该在这个环境变量里面添加
比如说我们一般都会查找文件 -type f,通常会忽略一些文件夹/目录 --exclude=...,下面是我的变量值:
export FZF_DEFAULT_COMMAND="fd --exclude={.git,.idea,.vscode,.sass-cache,node_modules,build} --type f"
界面展示 FZF_DEFAULT_OPTS
界面展示这些参数在 fzf --help 中都有,按需配置即可
export FZF_DEFAULT_OPTS="--height 40% --layout=reverse --preview '(highlight -O ansi {} || cat {}) 2> /dev/null | head -500'"
--preview 表示在右侧显示文件的预览界面,语法高亮的设置使用了 highlight 如果 highlight 失败则使用最常见的 cat 命令来查看文件内容
highlight 安装可能会有个小插曲。highlight 需要手动编译安装,默认安装目录在 /usr/bin, /usr/share 下面。然而在 macOS 中由于 SIP 保护,用户安装的程序不能在这几个目录下面「即使有 sudo 权限也不行」。我们可以手动更改下 highlight 源代码中 makefile 中的参数即可
# PREFIX = /usr
PREFIX = /usr/local
将 PREFIX = /usr 改成 PREFIX = /usr/local,然后 make,sudo make install 就可以了
触发命令行补全 FZF_COMPLETION_TRIGGER
默认是 **,一般不用修改
VIM fzf 插件
如果你使用 vim,那么官方提供的插件会让你的 vim 使用更加流畅
安装插件
如果你本地安装过 fzf 命令行工具了,只需要在 .vimrc 里面添加下面两个插件配置即可
Plug '/usr/local/opt/fzf'
Plug 'junegunn/fzf.vim'
注意:使用了 vim-plug 插件管理
插件主要对 fzf 集成绑定了一些和 vim 相关的功能,比如:查找当前 Buffer、Tag、Marks。甚至切换 window 更换 vim 主题配色等
命令模式下敲 Files 即可选择当前目录下所有文件,Buffers 可以过滤当前所有 vim buffer 内容
再配置几个常用快捷键就可以直接取代 CtrlP 插件了
- Ctrl + p 查看文件列表
- Ctrl + e 查看当前 Buffer,两次 Ctrl + e 快速切换上次打开的 Buffer
nmap <C-p> :Files<CR>
nmap <C-e> :Buffers<CR>
let g:fzf_action = { 'ctrl-e': 'edit' }
vim颜色显示百度一下就有
10.安装tmux窗口分割工具
brew install tmux

[[安装配置]]
cd ~
git clone https://github.com/gpakosz/.tmux.git
ln -s -f .tmux/.tmux.conf
cp .tmux/.tmux.conf.local .
11配置.zshrc文件并生效
#########################################################################
[[oh-my-zsh安装路径]]
export ZSH="$HOME/.oh-my-zsh"

[[主题配置]]
[[默认为ZSH_THEME]]="robbyrussell"
[[ZSH_THEME]]="agnoster"
[[ZSH_THEME]]="robbyrussell"

[[更改命令提示颜色]]
export ZSH_AUTOSUGGEST_HIGHLIGHT_STYLE="fg=#6a687a"

[[starship命令行显示]]
eval "$(starship init zsh)"

[[生效oh-my-zsh]],starship生效时不可同时开启
[[source]] $ZSH/oh-my-zsh.sh

[[相关插件开启]]
[[默认只有plugins]]=(git)
plugins=(
    zsh-autosuggestions
    zsh-syntax-highlighting
    vi-mode
    fzf
)

[[命令提示和语法高亮配置生效]]
source ${ZSH_CUSTOM:-~/.oh-my-zsh/custom}/plugins/zsh-autosuggestions/zsh-autosuggestions.plugin.zsh
source ${ZSH_CUSTOM:-~/.oh-my-zsh/custom}/plugins/zsh-autosuggestions/zsh-autosuggestions.zsh
source ${ZSH_CUSTOM:-~/.oh-my-zsh/custom}/plugins/zsh-syntax-highlighting/zsh-syntax-highlighting.plugin.zsh
source ${ZSH_CUSTOM:-~/.oh-my-zsh/custom}/plugins/zsh-syntax-highlighting/zsh-syntax-highlighting.zsh

[[fzf配置生效]]
[ -f ~/.fzf.zsh ] && source ~/.fzf.zsh

[[fzf主题配置]]
export FZF_DEFAULT_OPTS=" \
--height 80% \
--reverse \
--border \
--color=bg+:#363a4f,bg:#24273a,spinner:#f4dbd6,hl:#ed8796 \
--color=fg:#cad3f5,header:#ed8796,info:#c6a0f6,pointer:#f4dbd6 \
--color=marker:#f4dbd6,fg+:#cad3f5,prompt:#c6a0f6,hl+:#ed8796"
source .zshrc
修改iTrem2默认大小
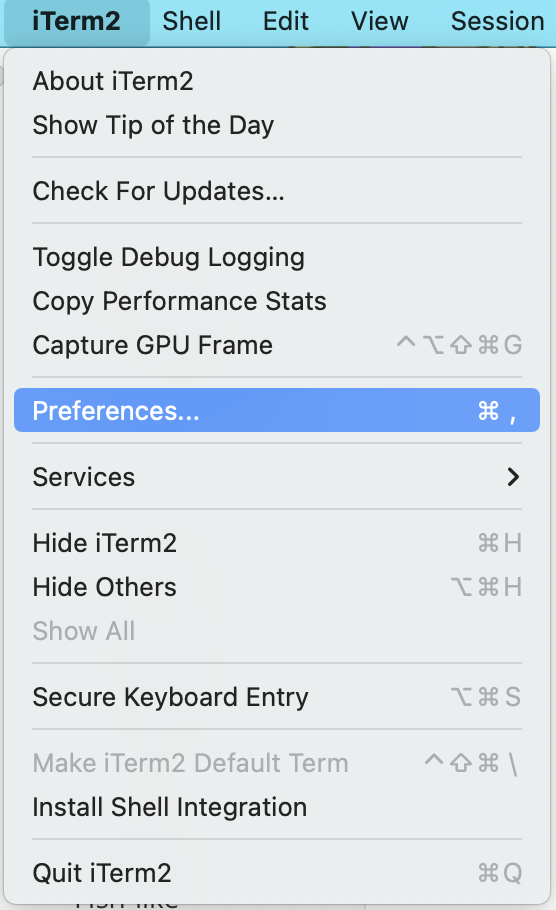

iTerm配置导出&迁移
路径:iTerm -> Preferences -> Profiles -> Other Actions
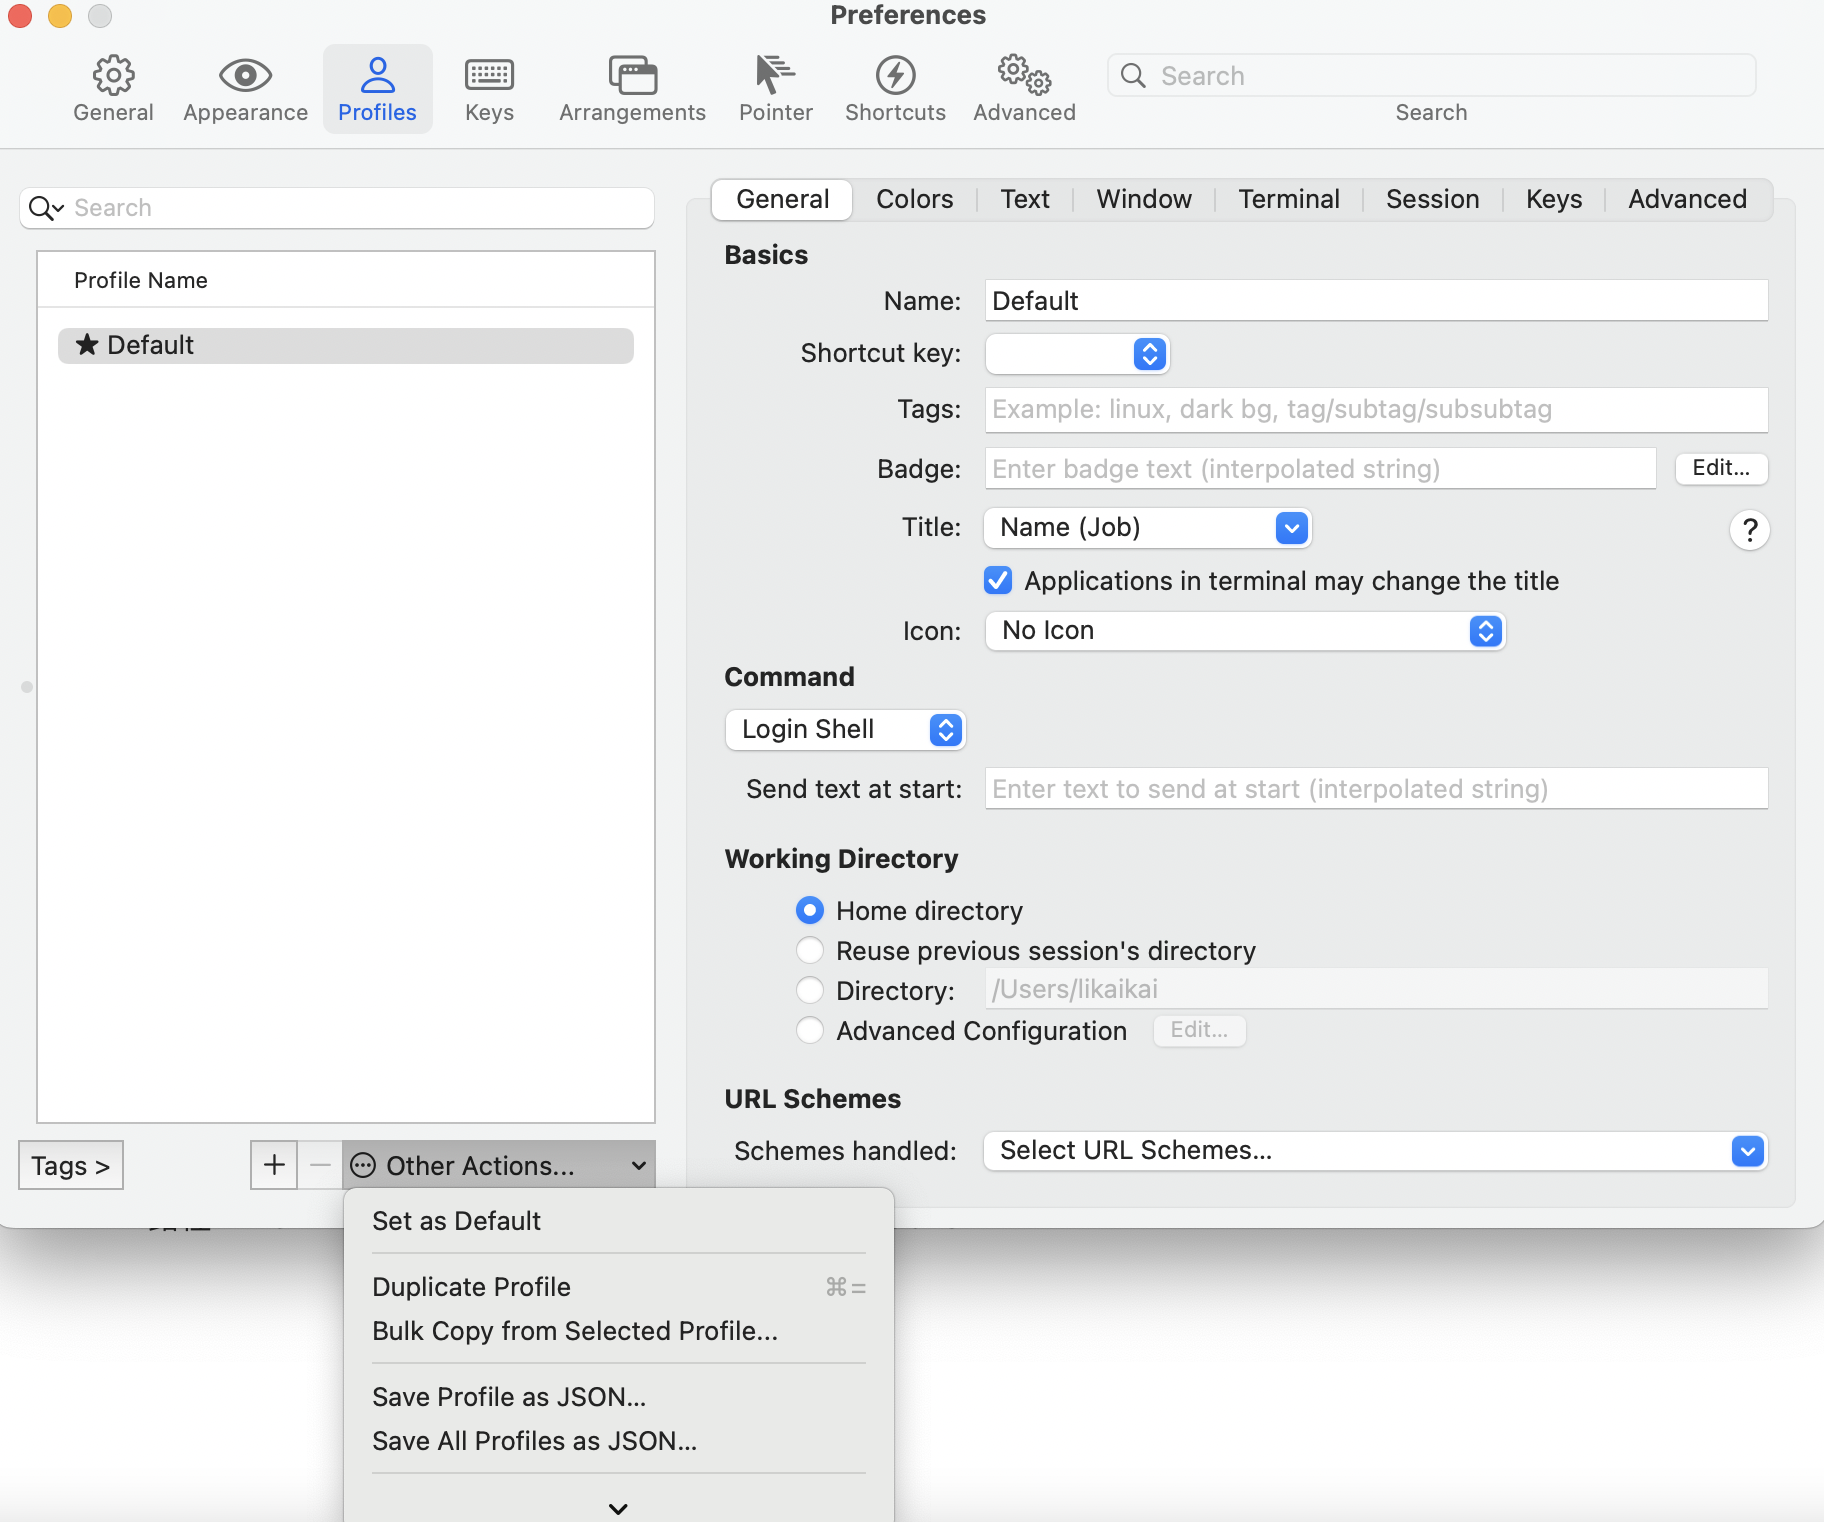
然后把这个配置文件,复制到新电脑的下面目录下或设置中倒入
~/Library/Application Support/iTerm2/DynamicProfiles/
lrzsz上传下载
使用rz和sz的方式进行,在安装完成iTerm2之后打开,然后使用homebrew的方式安装lrzsz
1、安装 lrzsz
brew install lrzsz
2、新建 iterm2-recv-zmodem.sh、iterm2-send-zmodem.sh 文件
注意是在 mac 上新建
内容从 https://github.com/snow-sprite/rzsz GitHub 上复制
iterm2-recv-zmodem.sh内容如下:
#!/bin/bash
# Author: Matt Mastracci (matthew@mastracci.com)
# AppleScript from http://stackoverflow.com/questions/4309087/cancel-button-on-osascript-in-a-bash-script
# licensed under cc-wiki with attribution required
# Remainder of script public domain

[[COMMAND]]=$(which rz)

if [[ -f /opt/homebrew/bin/rz ]]; then
	COMMAND=/opt/homebrew/bin/rz
else
	COMMAND=/usr/local/bin/rz
fi

osascript -e 'tell application "iTerm2" to version' > /dev/null 2>&1 && NAME=iTerm2 || NAME=iTerm
if [[ $NAME = "iTerm" ]]; then
    FILE=$(osascript -e 'tell application "iTerm" to activate' -e 'tell application "iTerm" to set thefile to choose folder with prompt "Choose a folder to place received files in"' -e "do shell script (\"echo \"&(quoted form of POSIX path of thefile as Unicode text)&\"\")")
else
    FILE=$(osascript -e 'tell application "iTerm2" to activate' -e 'tell application "iTerm2" to set thefile to choose folder with prompt "Choose a folder to place received files in"' -e "do shell script (\"echo \"&(quoted form of POSIX path of thefile as Unicode text)&\"\")")
fi
if [[ $FILE = "" ]]; then
    echo Cancelled.
    # Send ZModem cancel
    echo -e \\x18\\x18\\x18\\x18\\x18
    sleep 1
    echo
    echo \# Cancelled transfer
else
    cd "$FILE"
    $COMMAND --rename --escape --binary --bufsize 4096
    sleep 1
    echo
    echo
    echo \# Sent \-\> $FILE
fi
iterm2-send-zmodem.sh内容如下:
###
# @Author: your name
 # @Date: 2019-12-11 01:03:06
 # @LastEditTime: 2019-12-11 01:03:21
 # @LastEditors: your name
 # @Description: In User Settings Edit
 # @FilePath: /rzsz/iterm2-send-zmodem.sh
 ###
#!/bin/bash
# Author: Matt Mastracci (matthew@mastracci.com)
# AppleScript from http://stackoverflow.com/questions/4309087/cancel-button-on-osascript-in-a-bash-script
# licensed under cc-wiki with attribution required
# Remainder of script public domain

[[COMMAND]]=$(which sz)

if [[ -f /opt/homebrew/bin/sz ]]; then
	COMMAND=/opt/homebrew/bin/sz
else
	COMMAND=/usr/local/bin/sz
fi

osascript -e 'tell application "iTerm2" to version' > /dev/null 2>&1 && NAME=iTerm2 || NAME=iTerm
if [[ $NAME = "iTerm" ]]; then
    FILE=$(osascript -e 'tell application "iTerm" to activate' -e 'tell application "iTerm" to set thefile to choose file with prompt "Choose a file to send"' -e "do shell script (\"echo \"&(quoted form of POSIX path of thefile as Unicode text)&\"\")")
else
    FILE=$(osascript -e 'tell application "iTerm2" to activate' -e 'tell application "iTerm2" to set thefile to choose file with prompt "Choose a file to send"' -e "do shell script (\"echo \"&(quoted form of POSIX path of thefile as Unicode text)&\"\")")
fi
if [[ $FILE = "" ]]; then
    echo Cancelled.
    # Send ZModem cancel
    echo -e \\x18\\x18\\x18\\x18\\x18
    sleep 1
    echo
    echo \# Cancelled transfer
else
    $COMMAND "$FILE" --escape --binary --bufsize 4096
    sleep 1
    echo
    echo \# Received "$FILE"
fi
3、设置文件权限
chmod a+x /usr/local/bin/iterm2-recv-zmodem.sh /usr/local/bin/iterm2-send-zmodem.sh
4、配置 iterm2
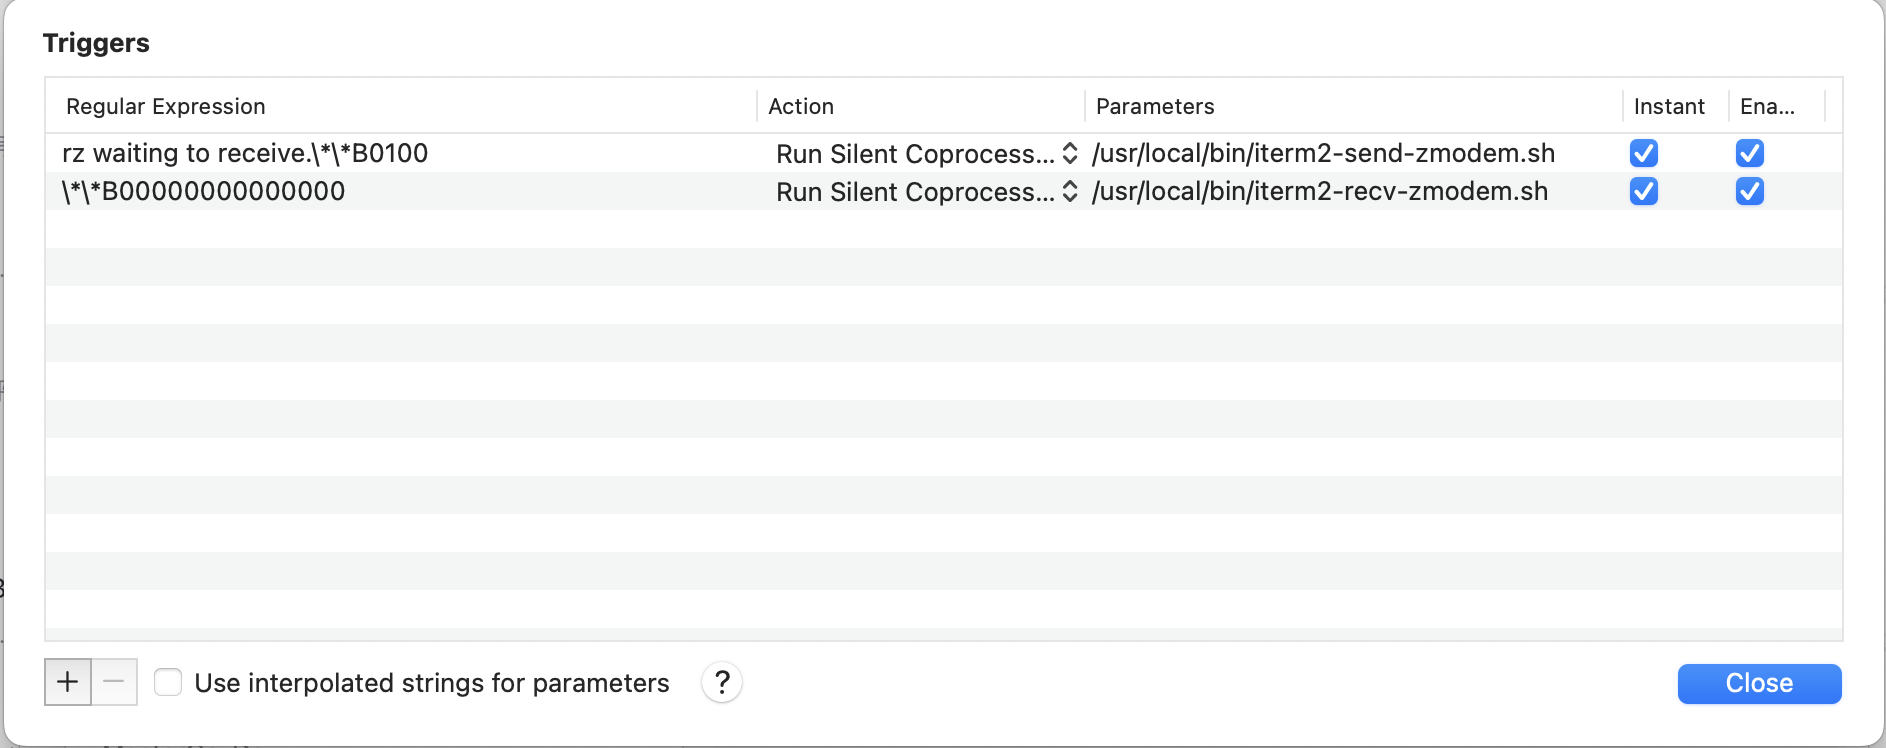
打开iTerm2的Preferences(快捷键command+,),然后Profiles->Default->Advanced->Triggers->Edit进入到编辑界面。

在Triggers界面点击左下角的加号按钮新建两行,Regular Expression分别为rz waiting to receive.\*\*B0100和\*\*B00000000000000,Action都选择Run Silent Coprocess…,Parameters分别为/usr/local/bin/iterm2-send-zmodem.sh和/usr/local/bin/iterm2-recv-zmodem.sh
[[Regular]] Expression
rz waiting to receive.\*\*B0100
\*\*B00000000000000

[[Action]]
Run Silent Coprocess...

[[Parameters]]
/usr/local/bin/iterm2-send-zmodem.sh
/usr/local/bin/iterm2-recv-zmodem.sh
5、测试验证
在iTerm2上输入rz,会自动弹出访问来,然后选择要上传的文件即可。
sz下载。
Mac中iTerm2 区分文件/文件夹的方法
Mac中iterm2 Solarized Dark主题下ls等命令后 文件和文件夹的颜色都是灰色,不好区分,有的方法是在当前窗口可以实现,但每次Cmd +T新建一个Tab就失效了;很是迷惑,不过还是感谢网友分享:
现总结–永久区分文件/文件夹的解决步骤如下:
Mac 系统:10.15
1、打开~/.zshrc文件
vim ~/.zshrc
2、在~/.zshrc文件末尾增加以下代码:
alias cls='tput reset'
alias egrep='egrep -G'
alias fgrep='fgrep -G'
alias grep='grep -G'
alias l.='ls -d .* -G'
alias ll='ls -l -G'
alias ls='ls -G'
alias vi='vim'
alias which='alias | /usr/bin/which --tty-only --read-alias --show-dot --show-tilde'
3、保存退出,然后source ~/.zshrc就可以了
参考链接:
iTerm2文件夹显示颜色_杨春建的博客-CSDN博客_iterm2 文件夹颜色
iterm2 中设置option箭头快捷键
-
cmd+,调出preference -
profiles -> keys: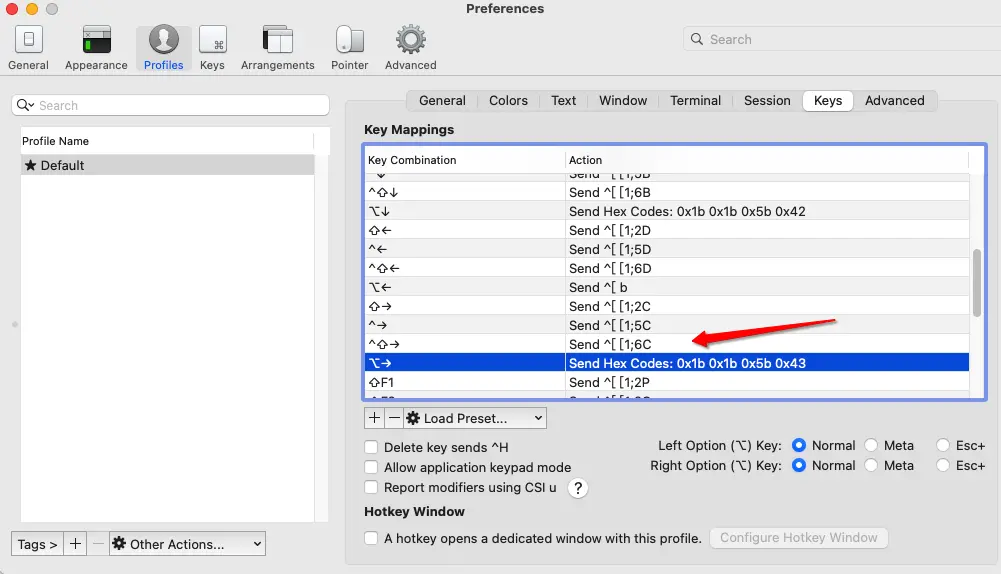
-
分别找到
⌥→,⌥ ←, 设置两个参数的值:Keyboard Shortcut与Action:
-
⌥→设置为: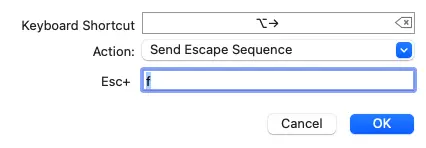
-
⌥ ←设置为:
1.打开iTerm2,打开偏好设置,点击左下角的加号新建一个profile
2.点击下入窗口选择command
3.然后再出现的command框中输入你的命令,也就是你要ssh连接的命令
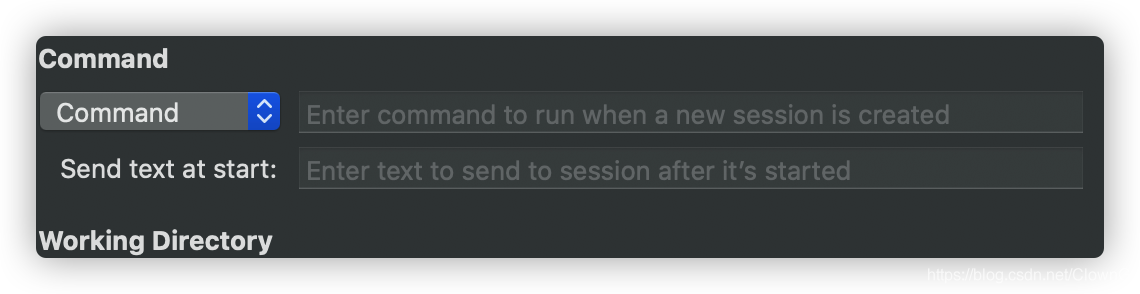
需要输入的命令如下:
在这里插入代码片
命令为: ssh root@xxxxxxxxxx -p 22
这里的root可以替换为你自己的用户名,后面的xxxx为你的主机地址,-p后面则跟随的是你想要链接的指定端口号
4.输入完命令以后选择Advanced,选择Triggers下面的Edit进行相关参数的编辑
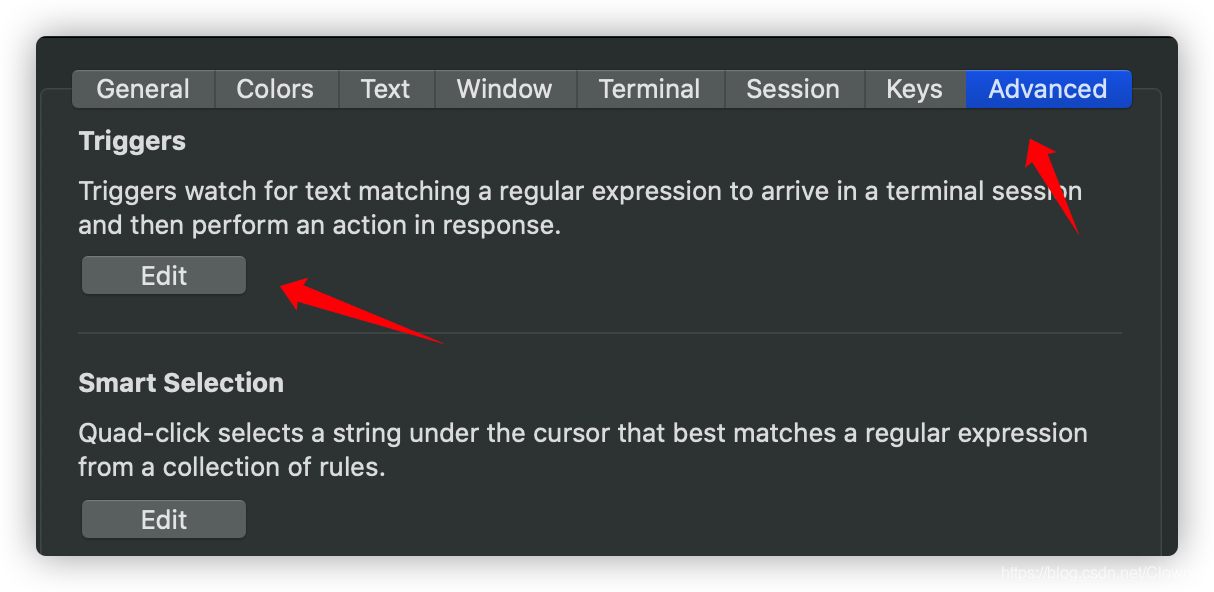
5.点击左下角的加号新建一行,然后按照如下提示填写
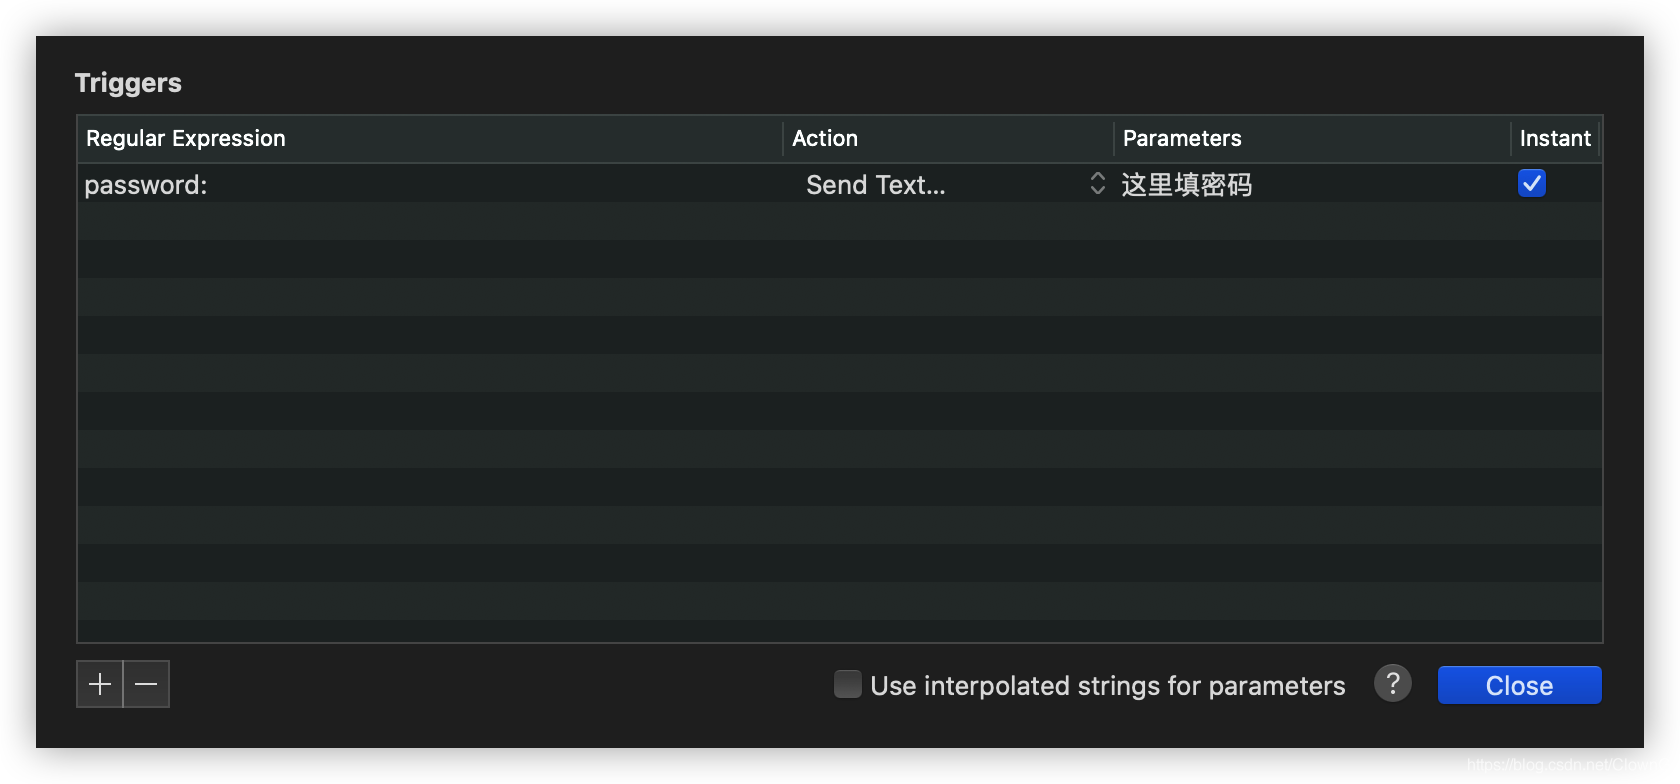
Regular Expression下面填写 password: 这个为触发词;
Action选择 Send Text…
Parameters则填写你连接主机时的密码,最后勾选上instant
6.最后再上面的profile里面选择你想要连接的主机就可以啦
Mac上利用iterm2多屏同时操作多个ssh终端
今天在本地的Mac上搭了一个集群用于测试Prometheus相关的东西,因为涉及到多台机器,有很多的操作都是重复的,如果能够敲一遍命令然后在多个ssh终端上同时执行,就可以省下很多功夫。Google了一下发现iterm2这个工具可以做到,这里记录下。
iterm2
iterm2是一款Mac终端的升级工具,在原始终端的基础上还增加了一些新功能,例如我现在最需要的多终端同时执行。
直接去官网下载安装即可使用。
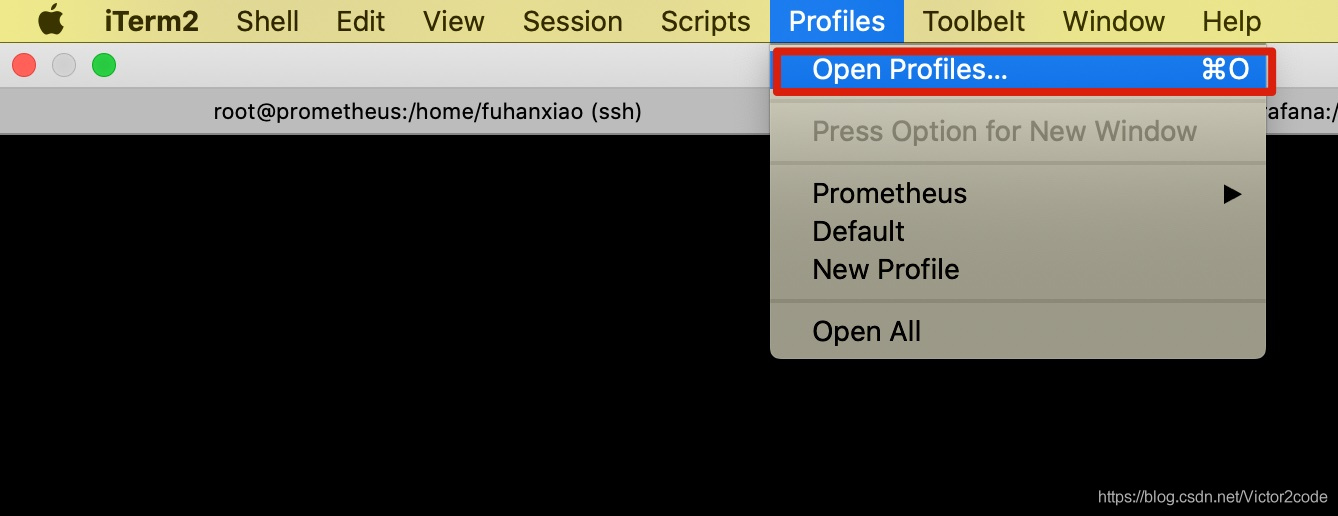
iterm2中利用profile来定义一个页签,如下打开「Profiles」,然后选择「Open Profiles」
然后选择「Edit Profiles」进行编辑
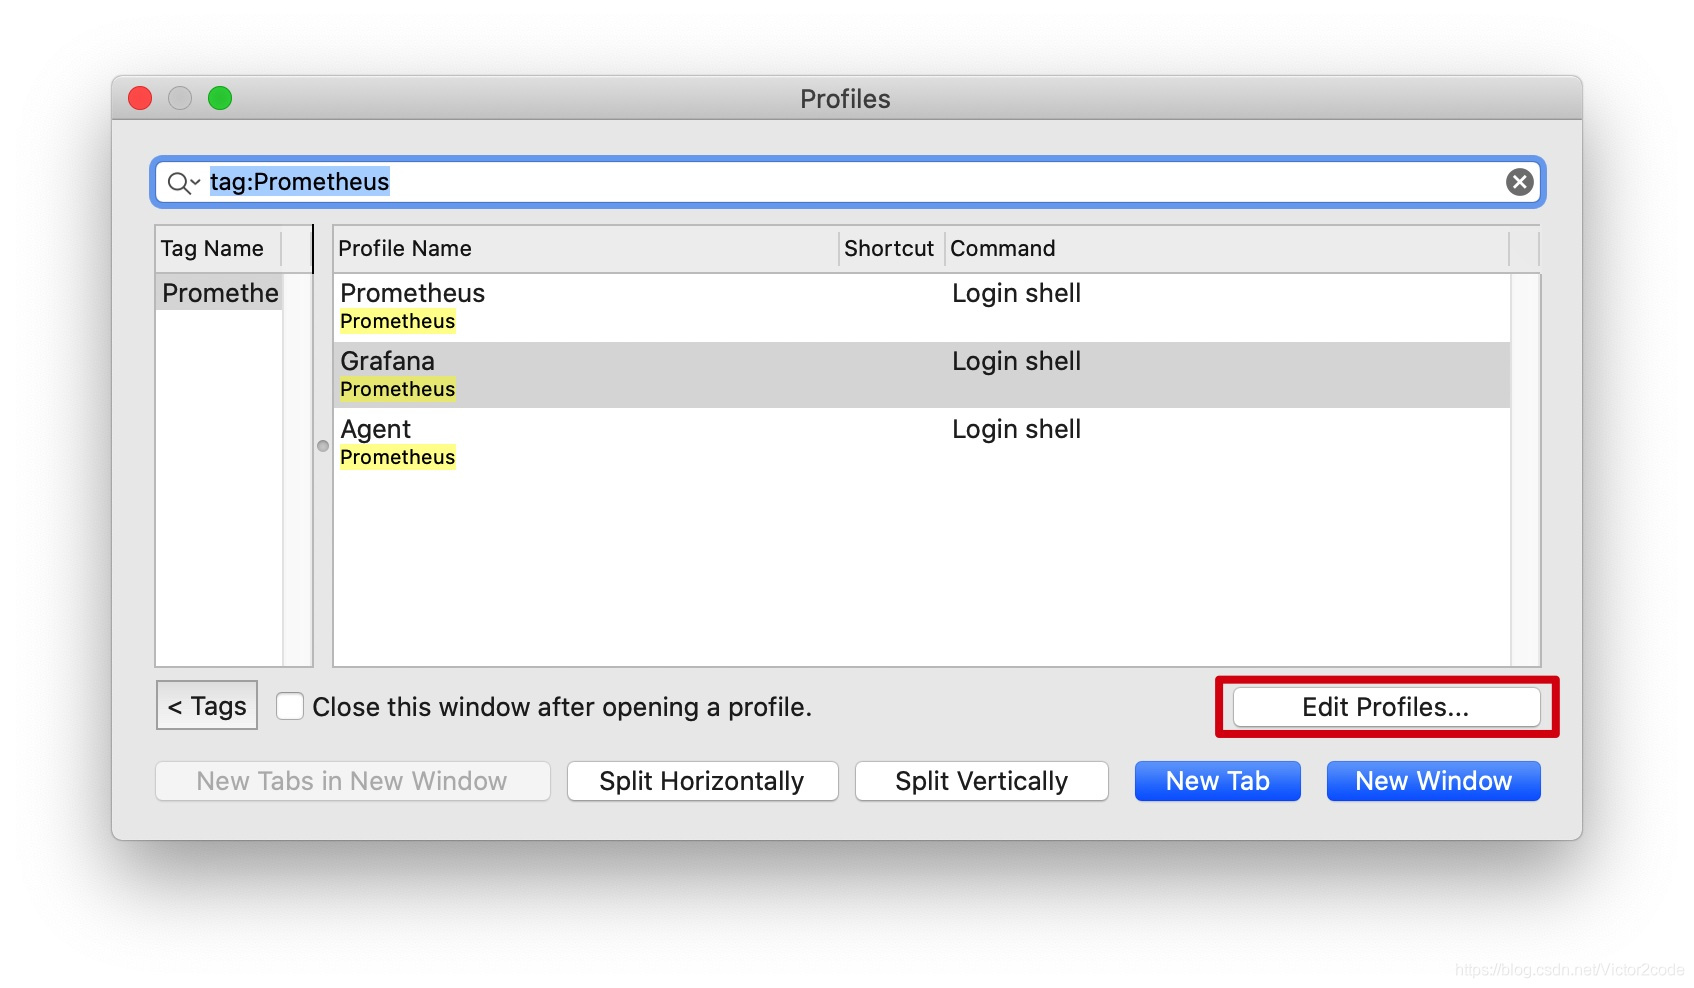
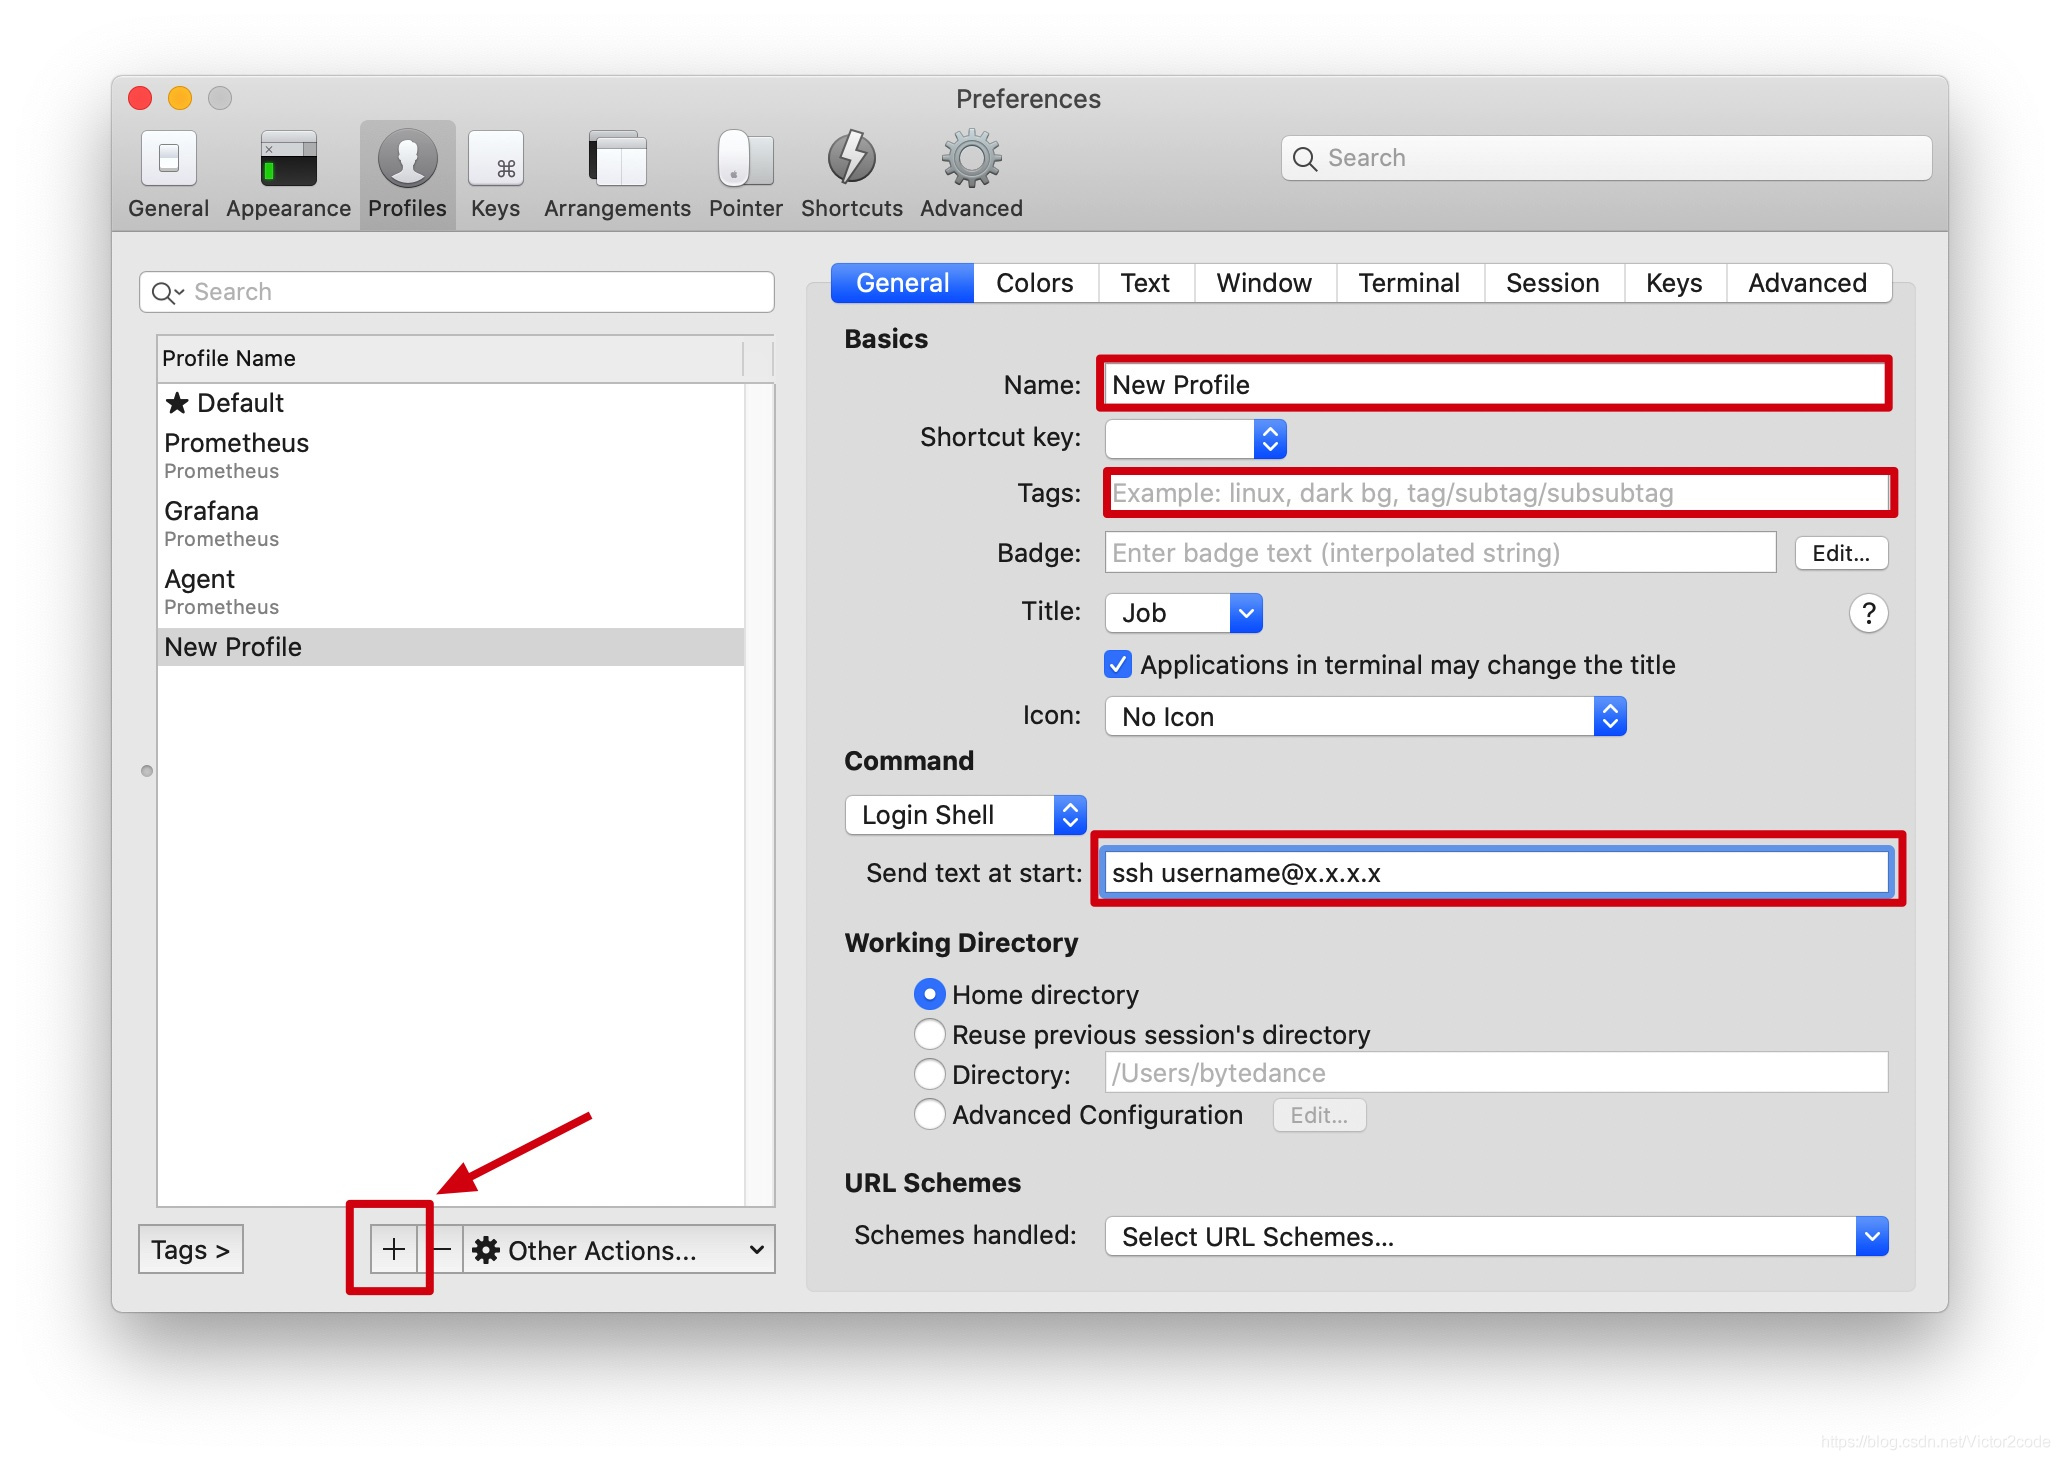
主要需要填的是红框的部分,其中「Tags」可以将多个profile组成一组,用于批量打开关闭之类的操作,如果要做ssh登陆,可以在下面配置打开页签时候自动执行的命令,例如ssh username@x.x.x.x,最后按左下角的加号即可。如下图所示,我加了3个profile,都属于Prometheus这个tag下
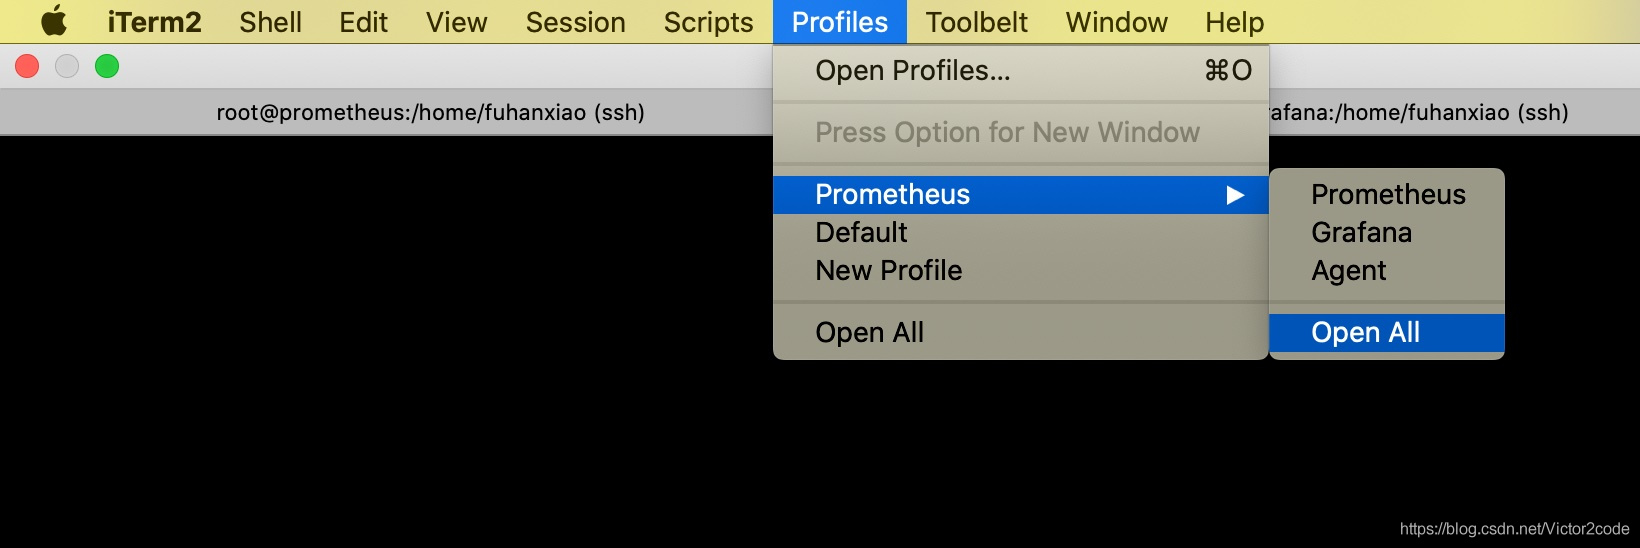
然后就可以像下面这样子批量打开了
分屏
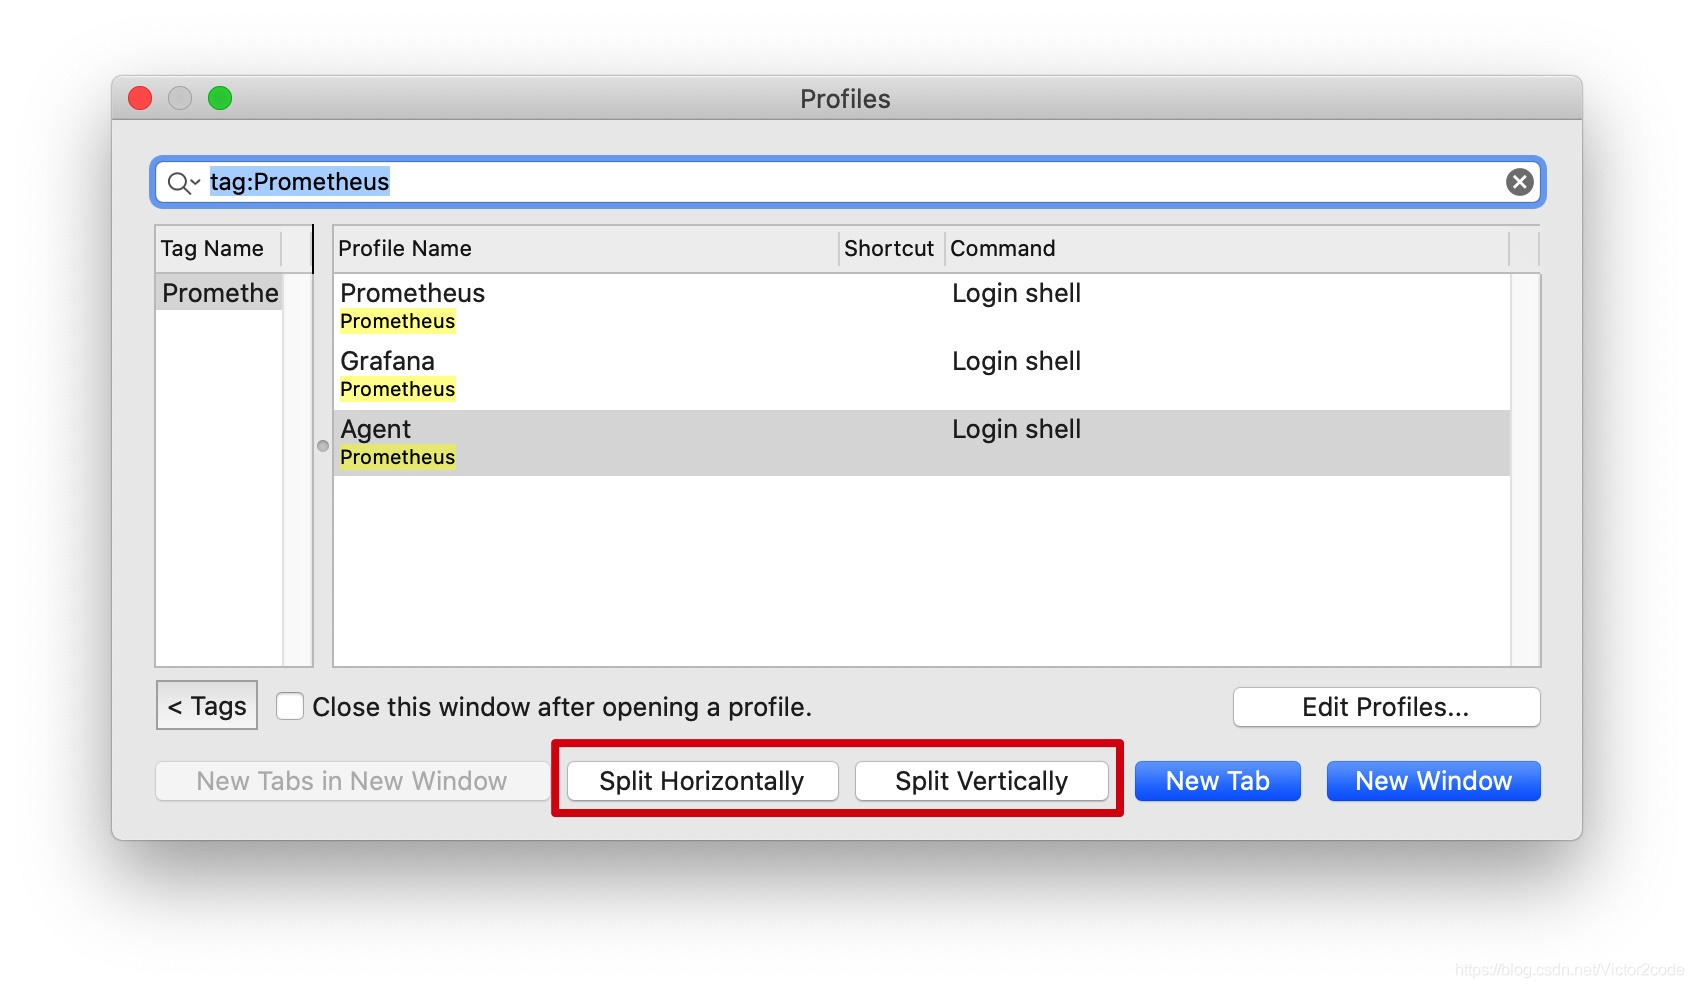
iterm2最炫酷也最实用的功能当属其分屏功能。
如下图所示,在「Profiles」中可以选中某个profile之后选择红框中的功能进行水平或者垂直分屏打开
下面就是我对刚才的3个ssh终端分屏打开后的效果,光标选中的的颜色会稍微黑一点,另外两个颜色比较浅
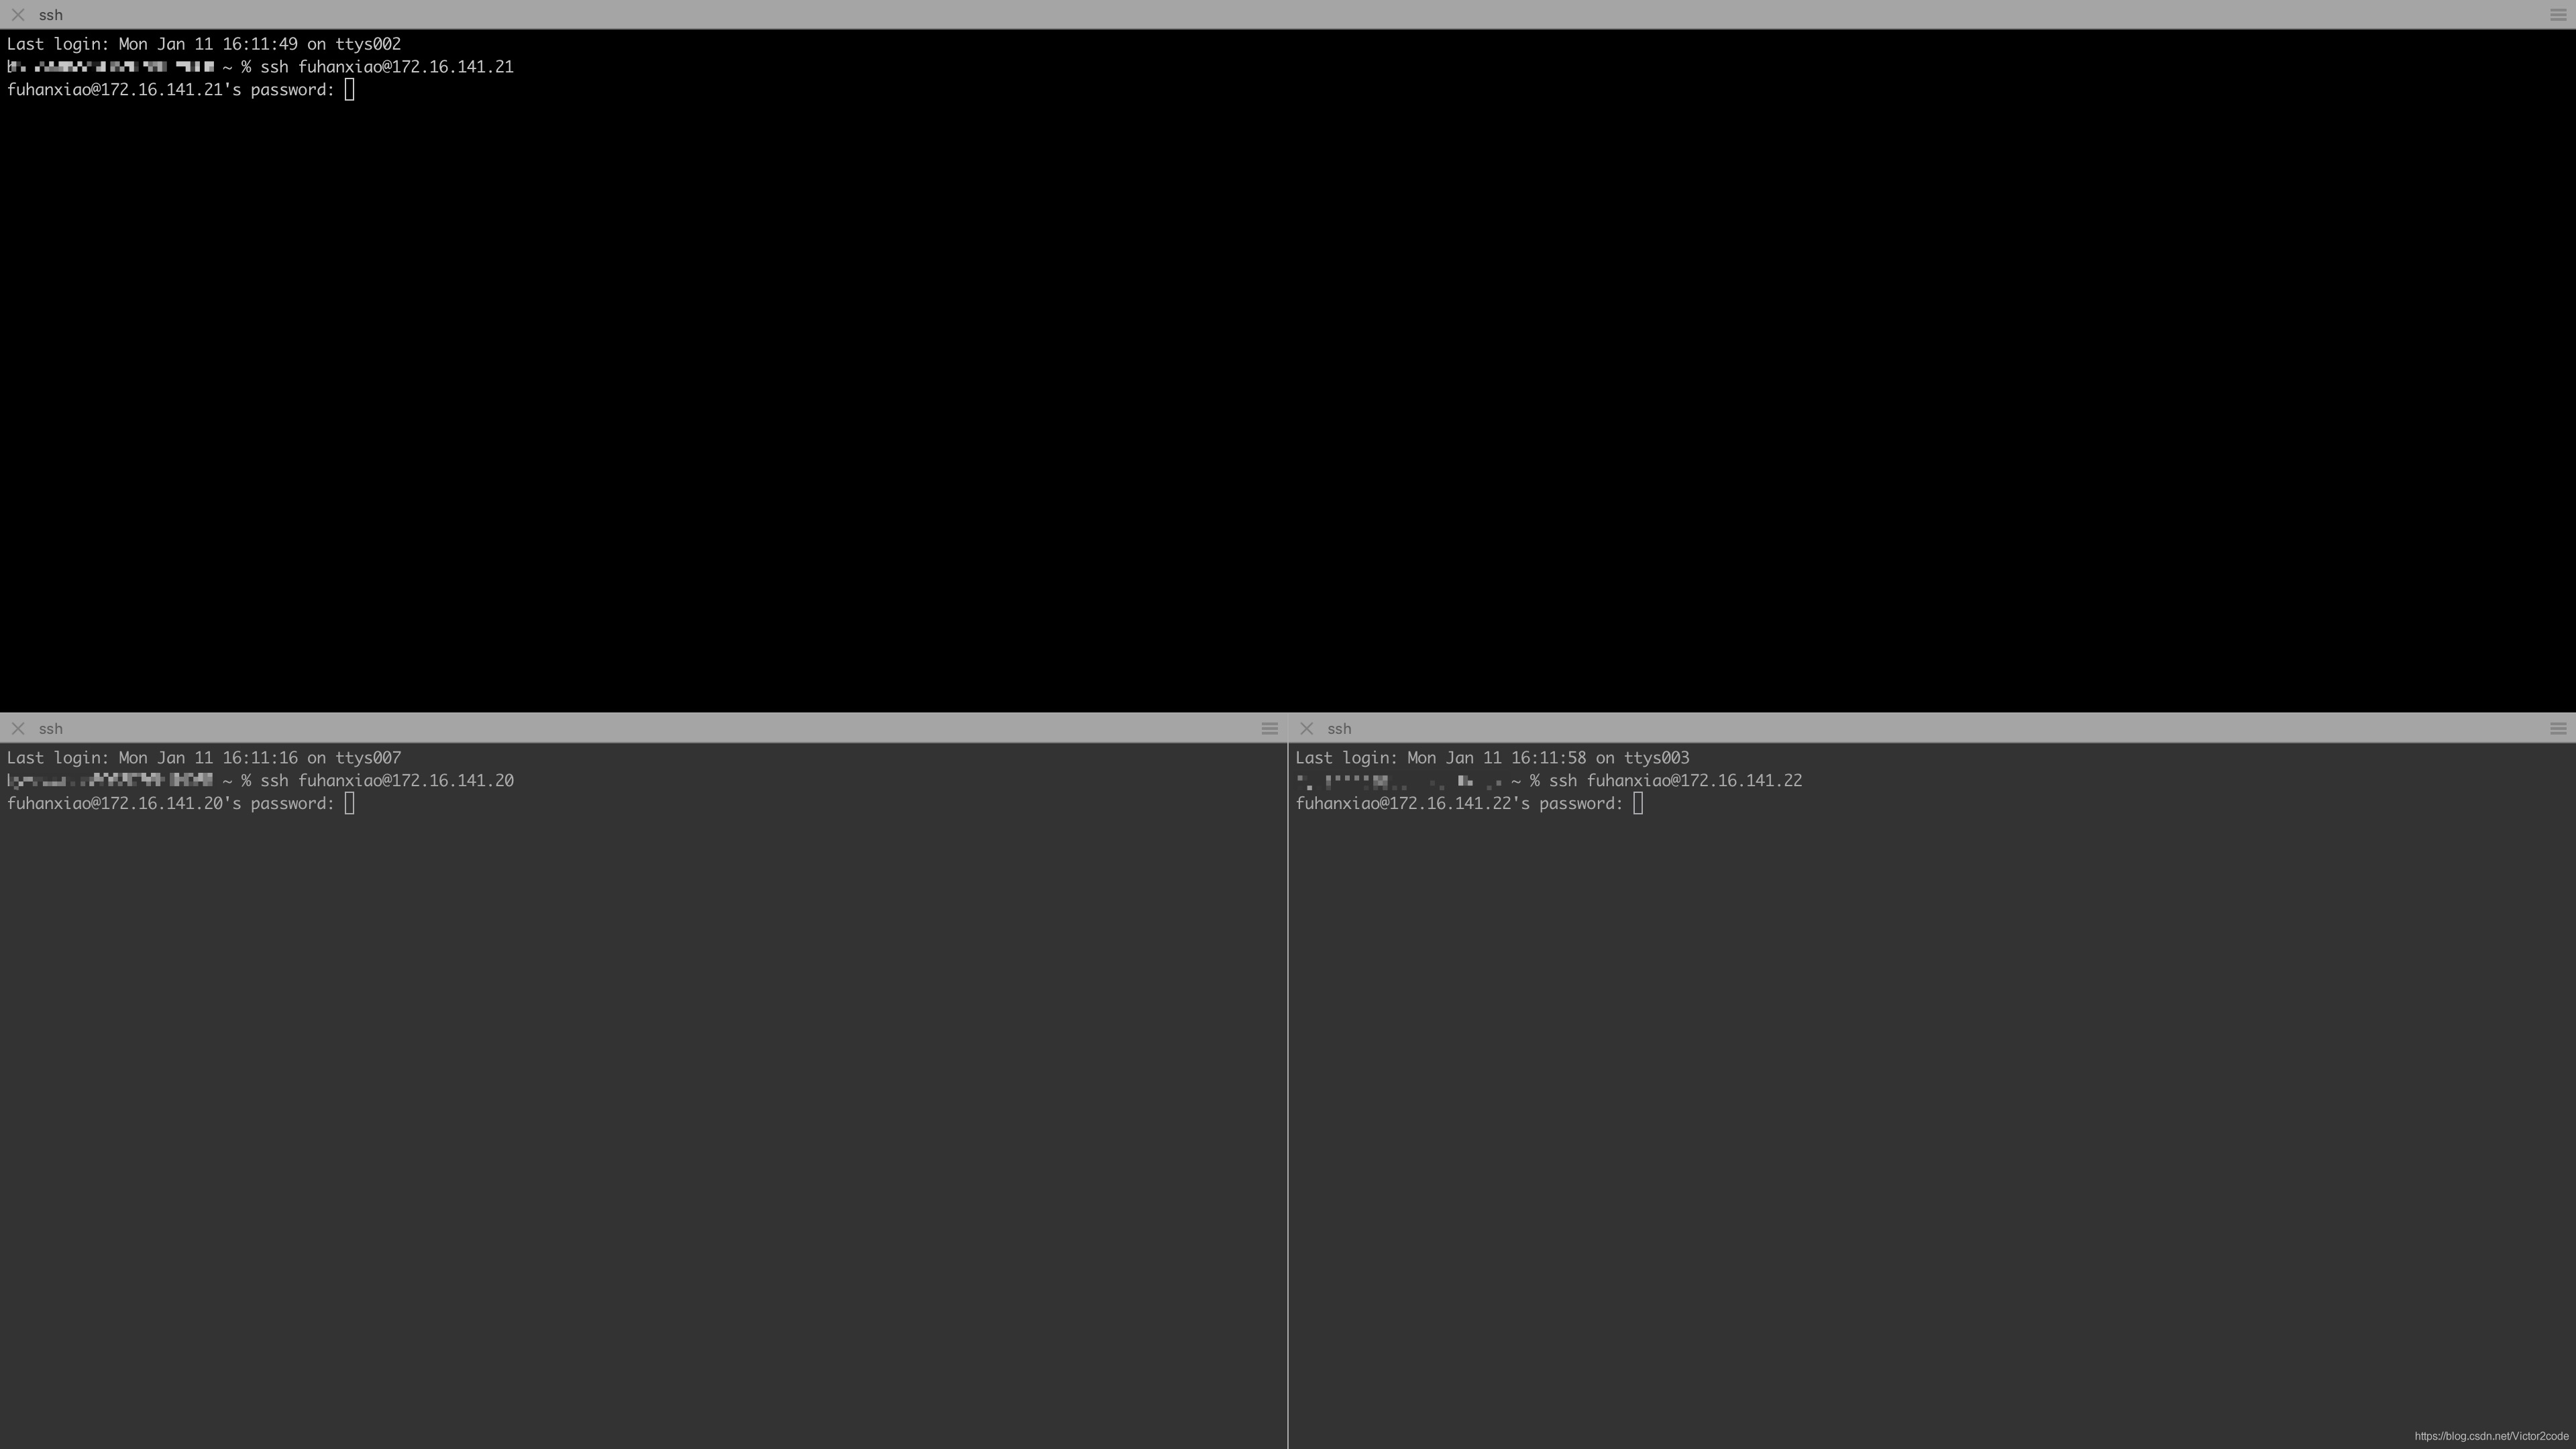
这个时候就需要用到下面提到的方法在这3个终端中同时输入密码了。
值得一提的是,如果只是想分屏打开多个当前的页签,直接用快捷键会方便很多,水平方向添加一个分屏用cmd+d,如果是垂直方向添加一个分屏用cmd+shift+d。
多屏同时输入
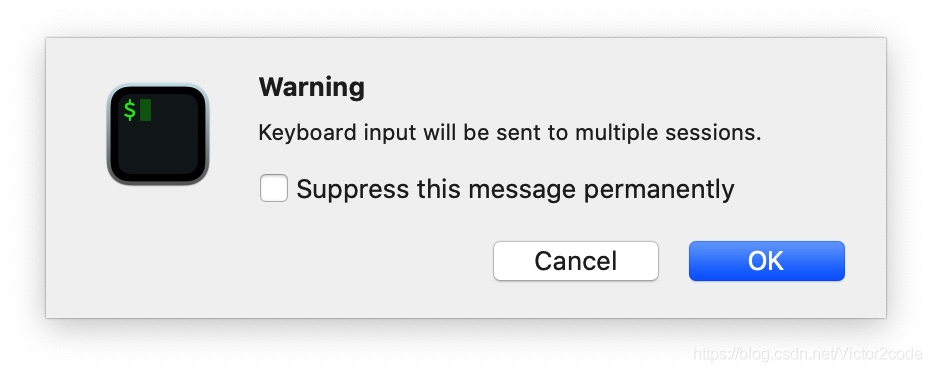
多屏以后如果想多屏输入使用快捷键cmd+shift+i,之后会弹出提示
点击ok之后会发现每个分屏上的右上角多了一个标志,如下所示
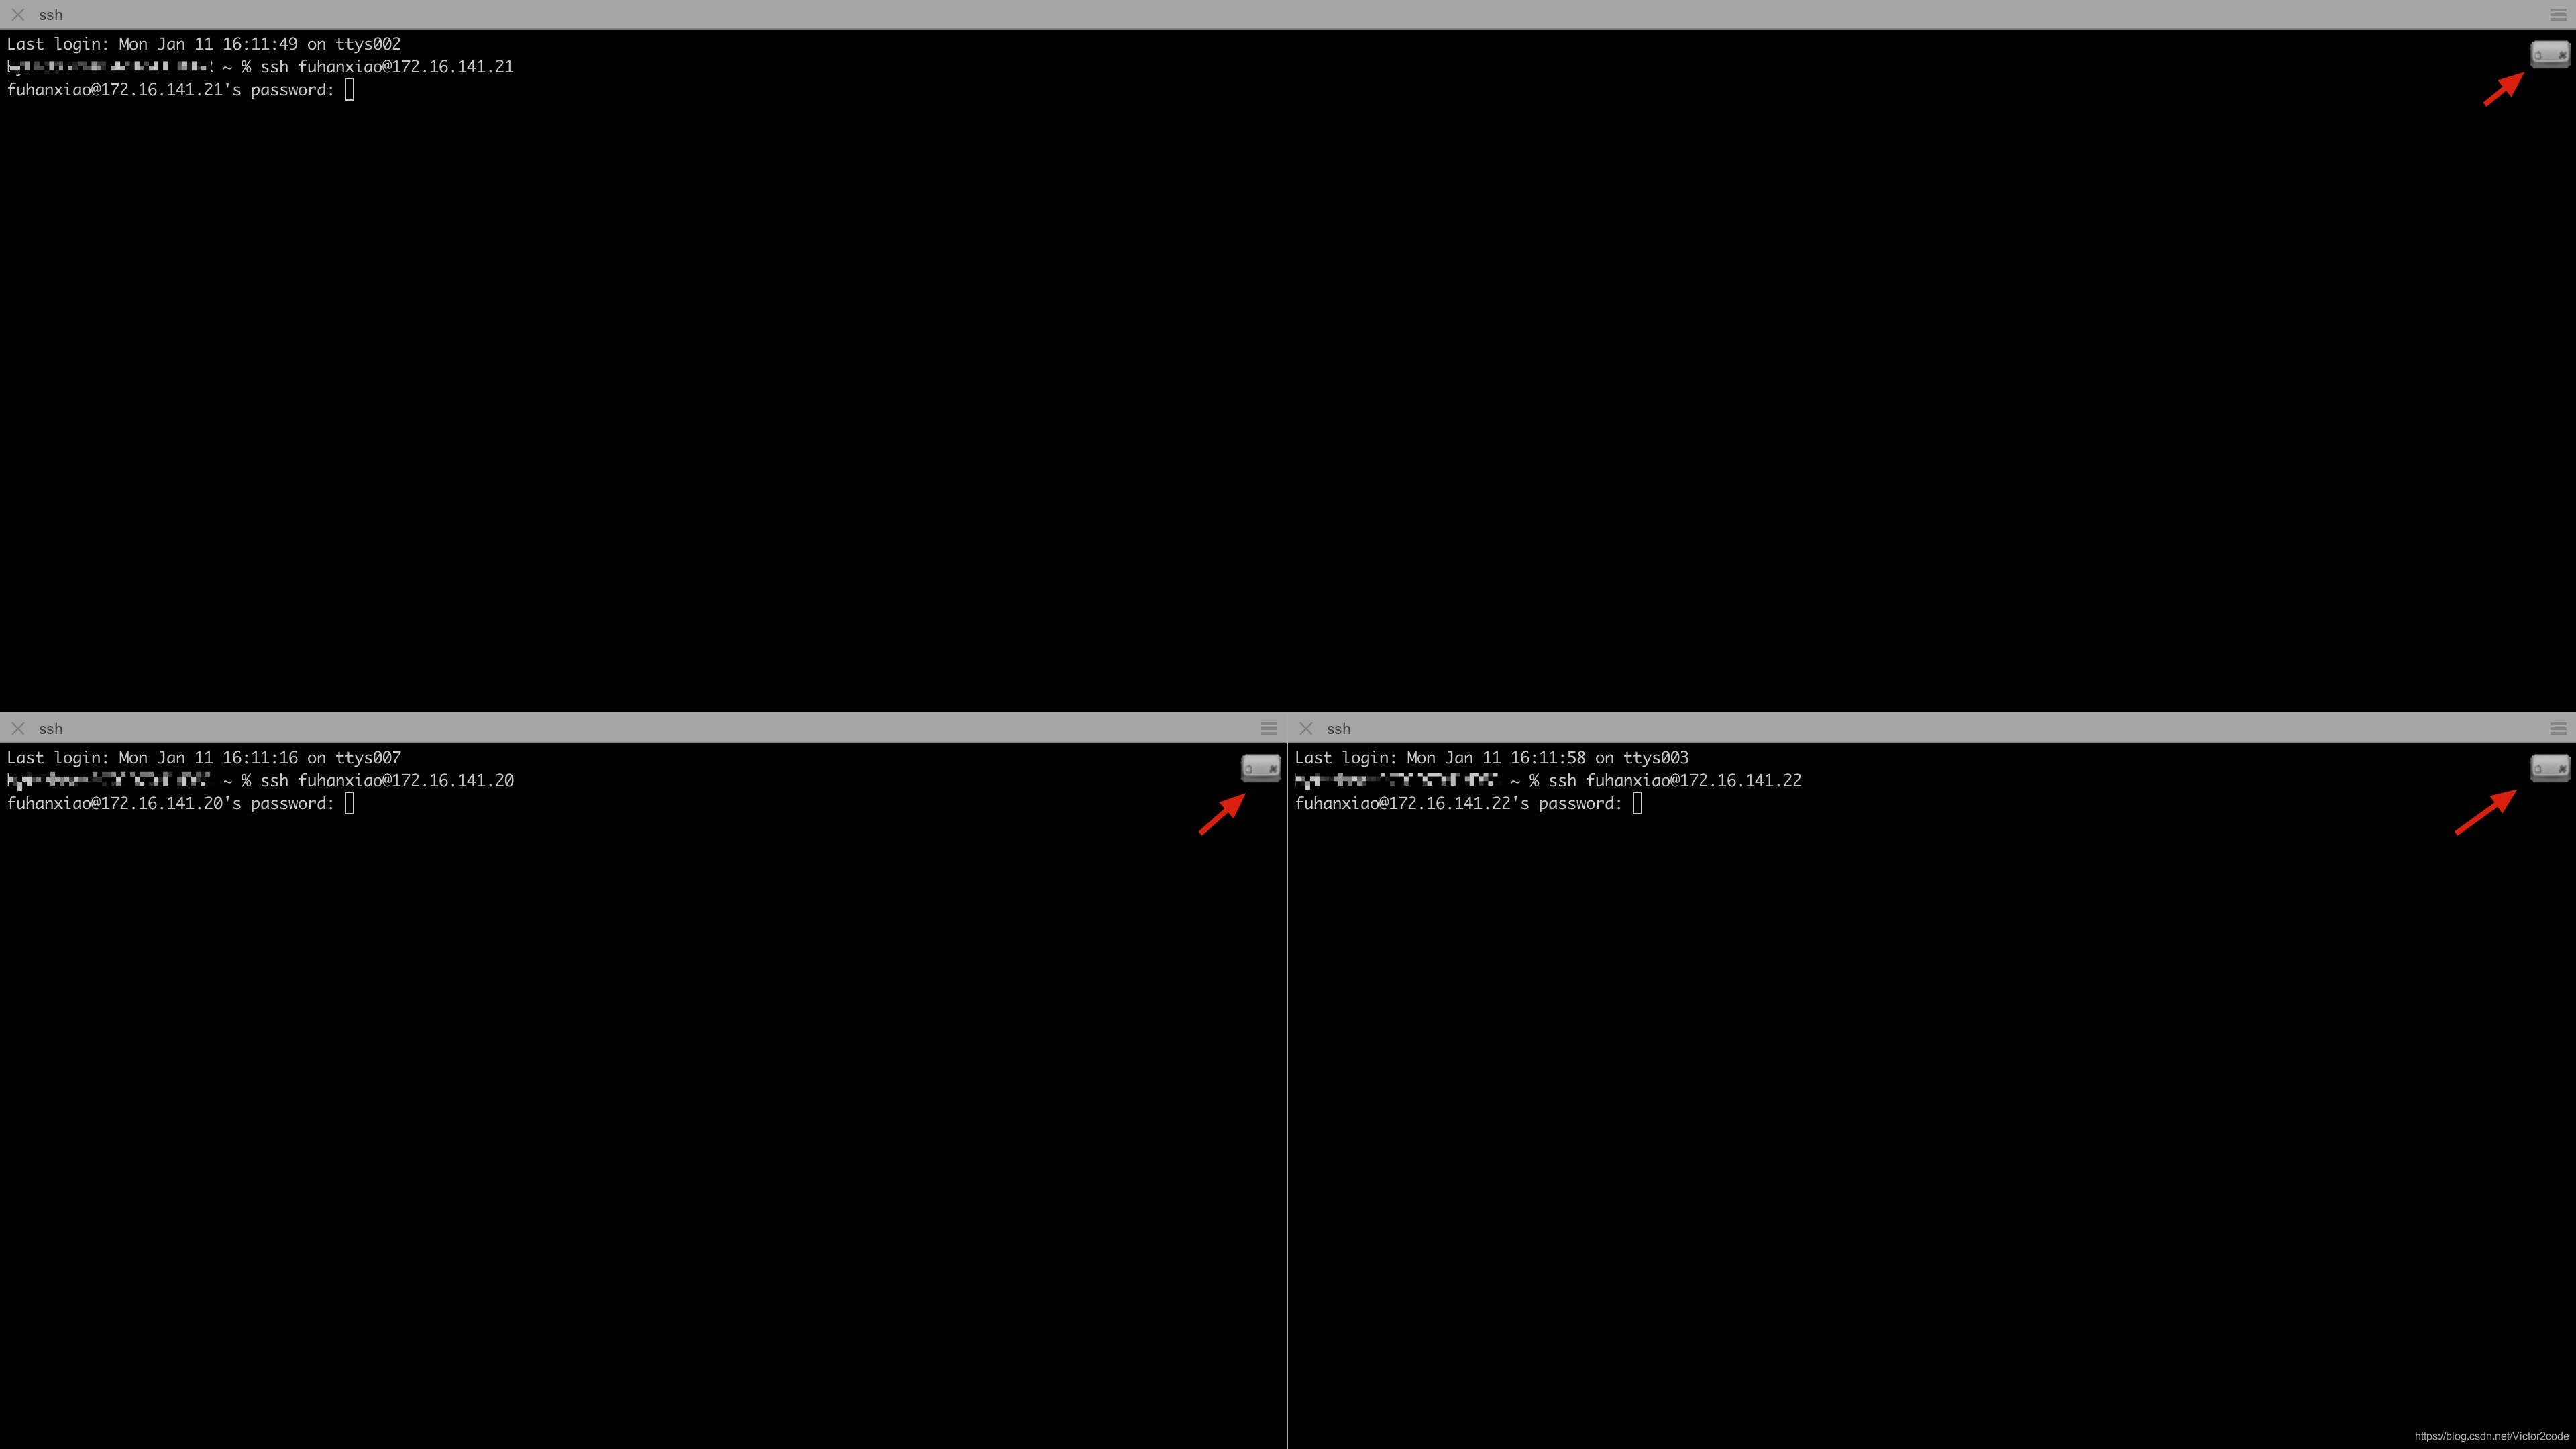
之后就可以同时对3台终端输入密码进行登录了。
但是iterm2有一个弊端就是必须对所有的分屏都输入,不能够选择某几个分屏来同时输入。经过测试,打开多屏输入功能后新添加的分屏也会有上面的这个icon。
如果想取消多屏输入也很简单,再次按下cmd+shift+i即可,icon消失。
补充
iterm2被誉为是Mac下最好用的终端工具,其还有很多有特色的功能,可以参考官网或者这个知乎回答来了解。
我是T型人小付,一位坚持终身学习的互联网从业者。喜欢我的博客欢迎在csdn上关注我,如果有问题欢迎在底下的评论区交流,谢谢。
固定标签名称
取消勾选此项以固定标签名
解决 在iterm2中,滚动滚轮或双指滑动触摸板,触发滚动命令行历史记录的问题
在Iterm2中,如果上下滚动光标(上下滑动触摸板、或者滚动鼠标滚轮),通常情况下会触发屏幕内容上下滚动。
但是在某些异常情况下,却触发了命令行历史记录的上下滚动,效果和你连续按了多次键盘的上下键按键一样。如:
 如果想永久解决这问题,可在item2的“Preferences”->“advance”菜单中找到“Scroll wheel sends arrow keys when in alternate screen mode.”,并将该选项的“Yes”修改为“No”即可。由下图可看到,此版本,改完立即生效了,再次双指滑动触摸屏,可看到屏幕开始滚动:

Iterm2 版本:3.4.8